Wednesday, November 8, 2017

Maple Holistics Silk18 Natural Hair Conditioner Review

Hi Sparkers!

Long time no chat.  I apologize for the absence but life got very busy this year.  Between the wedding, extra responsibilities with my day job, and the peaks and valleys of 2017, this year has been quite the journey for Mrs. Sparkles.  I was motivated to get back into the swing of things by an amazing opportunity provided to me by the company Maple Holistics!  They were kind enough to send me their Silk 18 Natural Hair Conditioner* in exchange for my review.  As usual, I'm always upfront with all of you when I get these types of opportunities and I am allowed to express my true opinion of this product!  The Maple Holistics representative I worked with was kind and professional.  They really stand behind their product and are a wonderful company as you will see if you continue to read this post. 

Nutshell Review:  I love this product and this company.  I will repurchase this conditioner and try other products.


There are a lot of reasons why I'm a new superfan of this product and I look forward to trying many more.  Let just start with the obvious: it works! 

Performance
I was initially skeptical because the formula felt thin and more watery than my go-to all natural conditioner Shea Moisture: Superfruit Complex 10-In 1 Renewal System Hair Masque.  I was worried that it would not be moisturizing or leave my hair in better condition--it is beached platinum from naturally black, so I need all the help I can get.  But never to fear, after waiting about 10 minutes with this in my hair during my latest "destress from life bath," my hair was silkier than it has been in ages.  Per Maple Holistics's website:

"Silk 18 gets its name from the 18 Silk Amino Acids found in its formula. No matter your hair type, our blend of essential oils and silk amino acids will smooth and soften your locks to shiny perfection. The natural vanilla scent of Silk18 is delicious and calming. Our products are free of sulfate and other harmful ingredients and Silk18 is no exception!"

Another benefit to this conditioner over my go-to, is that it really would work for all hair types.  If you have extremely fine hair, Shea Moisture products tend to be very heavy.  I'd say that even the finest hair would end up silky AF using this stuff.   

There are no directions on the bottle but I shampooed with my favorite shampoo then left this in my hair for about 10 minutes in the bath.  I would work the same if you put it in while showering, then washed your body and maybe shaved.  I do think it is light enough to also use as a daily conditioner if you like to rock a sleek and smooth look most of the time.

Ingredients:
You cannot beat simplicity of ingredients here for your health and the environment.  This is labeled non-toxic so I'd say this is safe to use for kids as well.  If kids can eat crayons, they can definitely accidentally swallow a bit of this without issue.

Water, Aloe Barbadensis Leaf Juice, Argan Oil, Shea Butter, Certified Organic Pomegranate, Hibiscus, Green Tea and Sea Buckthorn, Silk Amino Acids, Jojoba Oil, Natural Vanilla Fragrance

Price:
You would expect a premium ingredient product like this to be the list price of $30, but on their website, it is only $9 for 8oz!  I know this isn't a ton of product but I also know I used way too much initially.  I thought that because it was more watery than I am used to that I needed to keep adding more.  That isn't true.  I think about one tablespoon (or two if you have extremely long/thick hair) is more than sufficient.  This product is a great price for the quality and results.  If you are still on the fence, Maple Holistics will send you a free sample so you can try their stuff for yourself!  They have 16 products for you to choose from so you can pick the sample that is the most applicable to your needs. 

Bonuses:
I was not asked to talk about these things, but I felt I just had to!

Not only is the company, the product, and the ingredients used wonderful, but Maple Holistics is proud to support The National Coalition Against Domestic Violence. For every bottle of Silk18 sold, Maple Holistics will donate $1 to NCADV.  How amazing is that?!

There is also a cool Maple Holistics Subscription Box that will send you a surprise:  shampoo, conditioner, essential oil, and bonus product every month for just $40!  It is a great savings and fun way to try new Maple Holistics products.

Conclusion:
I am very impressed with this brand and product.  I hope you sparklers will give it a try, and with the opportunity to get a free sample, why not?

It's good to post again Sparklers, I missed you!

As usual,

Shine & Sparkle!


*I did receive this product for free from the company mentioned in this post in exchange for my honest review.  These are my honest feelings and opinions.

Wednesday, September 21, 2016

A Tribute to Squiggles

Hi Sparklers,

You might have noticed that I haven't posted with Mr. Squiggles in a long time.  This is because he has crossed over the rainbow bridge.  We took him to the vet and did everything we could, but it was his time to frolic with all the other piggies in piggy heaven.  I'm still pretty sad about his passing months later, even though we have 2 new piggies, there will always be a hole in my heart where I miss Squiggles.  The hole is getting smaller but will never be totally gone.  He was a pretty special piggie and he is very very missed in our household.  Soon I will introduce you to the new piggies that will be featured on this blog (they are very stylish).  But for now I'd like to dedicate this post to some of the highlights from all the great contributions that Squiggles has made to this blog over the years. RIP Squiggles.  We miss you.

P.S. Use the search box in the upper right of your screen to find any of these old posts you are interested in or click the the pictures below.  Also, there are many other posts and pictures of Squiggles throughout this blog, if you explore around, you can probably find them all!

Squiggles first photo appearance along side his very Tangle Teezer-like hand drawing.

Squiggles in a turban for the DIY facemask post.
Chef Squiggles


Oh-so-popular with you Sparklers CreaClip knock off review!

Flash Back to baby Squiggles!
Squiggles in a Sombrero
Squiggles was featured in a lot of recipe posts with his feelings about the food.
He never quite understood beauty, but he sure understood how to be adorable!
Captured Squiggles-Piggle-Pie mid yawn for his last post he was featured in before he passed.  

I hope you enjoyed my tribute post to Mr. Squiggles; aka "Squiggies"; aka "Squiggles-piggle-pie"; aka "piggles".  He will be missed dearly not only by those who knew him in person, but those who got glimpses into his life thought this blog.

As always,
Shine & Sparkle!


Thursday, September 15, 2016

Platinum Blonde At Last! New Updated Hair Care Routine Post

Sorry to be gone so long everyone!

I see from our Facebook Page that we have a lot of new Sparklers out there!  A warm welcome to all and I do apologize for neglecting things.  Life has been crazy with wedding planning and life in general.  But I am back!  It has been requested that I do a post on my updated hair care routine since the last time I posted about my last hair lightening experience was all the way back in 2014!  If you follow me on Instagram you will probably have seen that I have finally made it to platinum!

As you can see in the picture below, I have a new amazing hair guru--her name is Iva and works in the Bay Area in Northern California.  Send me an email if you are serious about going to see her!  Hopefully I will have more internet details for you to get a hold of her soon.  I will provide that information as soon as possible. She uses advanced lightening techniques that use no heat and bond rebuilding products that mean I got this light in just 2 applications (in one sitting) with NO damage.  It is truly incredible work!  Mini Tip: If you want to go platinum quickly, make sure you have a stylist that uses Olaplex or B3 Bond Builder, these are the best bond repairing formulas on the market!  There is no reason why you should not be getting this hair-saving product in your color other than the stylist doesn't want to keep up with the most current technologies that are best for your hair.  Going platinum is tricky business and you want the best if you are going this light!  Also, I do not suggest going platinum yourself.  It is too hard to prevent overlapping of the bleach when you DIY this, which causes bands of damage that will cause major problems and breakage in the long run!  I had Iva used a balayage techniques to apply the bleach and  put a ash brown shadow root on my blonde hair because it think it makes it look more pretty and natural.  If you want a similar look, ask for that! 

You know where you can see my hair as it becomes blonder in all sorts of lighting contexts? twitter! You should follow me! We can be digital buddies, whoo!  Also, you can get sneak peeks into what reviews/reports are coming next.  You can even tweet me ideas for what to do next.  You can also follow me on other social media like facebook page; or an instagram; or a bloglovin; or a google+

Wash and Condition:
This is pretty much the same as my last post, I only wash my hair fully about 2-3 times a week. I've found that dry shampoo really seems to irritate my scalp these days so I'm washing a bit more often (or embracing braids and other styles that look good with oiler hair).  Side note, I do SHOWER every day still, I just don't worry about washing my hair every day--shower caps are my BFF.   I've gotten super sweaty at the gym but I'm not supposed to wash my hair, I still conditioner wash my hair (see my conditioner washing post).  The products I use have changed significantly with my new platinum look.
  • Joico: Color Endure Violet Sulfate-Free Shampoo and Conditioner- My NEW go-to shampoo and conditioner duo.  I use it pretty much every time I wash my hair now.  I try to leave the shampoo in for at least 2-3 minutes and the conditioner in 3-4.  I love how moisturizing both products are and it really is formulated perfectly and gently for us bottle blondes.  I do still shampoo twice, but the first time I only use a tiny bit of shampoo.  I fully lather and wait on the second wash.  I condition once.
  • Paul Mitchell: Tea Tree Special Shampoo and Conditioner-  Still use this once a week to clarify my hair of silicones and product build up.  It also really helps treat any scalp issues I may be having with dandruff or itchy-ness.  I also still use the conditioner to co-wash.
  • Shea Moisture: Raw Shea Butter Deep Treatment Masque or Superfruit Complex 10-In 1 Renewal System Hair Masque - I will replace the Joico Shampoo with this once a week or so to deep condition. I'm still in love with these masques but I do need to leave them in longer to see benefits.  I will apply them then get out of the shower with my conditioner laden hair in a cheap plastic shower cap and wait a good 20 minutes (or longer if possible) before rinsing it out.  I do make sure that moisture is my issue before doing this using a strand test. To strand test for moisture, I take a clean and wet piece of hair that has fallen out after I shampoo and pull it until it breaks. If I pull it and it snaps really quickly, I know it is time for a moisture deep treatment! 
  • Aphogee: Keratin-2-minute-reconstructor- I still use this product but much differently.  I only use this when a strand test feels like I need a dose of protein.  To strand test for protein, I take a clean and wet piece of hair that has fallen out after I shampoo and pull it until it breaks. If I pull it and it stretches a lot (kind of like a rubber band) I know it is time for Apogee!  I leave it in for about 2-10 minutes depending on how stretchy the strand test is.
  • Macadamia Professional: Deep Repair Masque- I will still replace my other conditioners with this all over my head if my hair is in a huge funk and I have no idea what to do.  Works every time.  I leave it in as long as possible. I'll try to get out of the shower and let it sit for 30 minutes if I can.  Otherwise, 5-10 minutes works ok as well.
After Shower Care and Styling:
This is also the same other than the products I am using.  I let my hair dry in a micro-fiber hair towel while I do my skin care routine.  Then I gently detangle using a wide tooth comb or my Tangle Teezer (no I didn't make up the terrible product name).  I have also used The Wet Brush, but I find the wet brush to actually just be a better replacement for a normal paddle brush to be used only on dry hair.  I'd stick with a wide tooth comb or Tangle Teezer when it is wet.  Then I will towel dry for a few more minutes before applying leave in treatment if I'm using heat then serum (which I always use).
  • Shea Moisture: Black Caster Oil Strengthen, Grow, Restore, Leave In Conditioner with Shea Butter, Peppermint, & Keratin-  This is my step right after towel drying my hair every single time with my platinum hair. Also, who thought of that ridiculously long name?! I probably use at least a tablespoon of this stuff from my mid lengths to ends and put any remaining in the top part of my hair and massage my scalp.  My hair and scalp drink this up now. 


  • Paul Mitchell: Super Skinny Serum- As my hair gets more damaged from the lightening process,  I use this but when I know I'll be using my Paul Mitchell Tea Tree shampoo with sulfates to wash it out soon because this is a heavy silicone and I don't want to damage my hair long term.  (see my post on silicones in hair products). If my hair seems to need even extra TLC, I will still mix 3 drops of pure Argan Oil into 1.5 pumps of my Super Skinny Serum and rub the mix beween my palms before applying it below my ears and focusing on the ends.  Any remaining residue (maybe a few drops total of the mixture) I scruch/smooth into the upper part of my hair.  
  • Wella Professionals: Oil Reflections Smoothing Oil-  This is a new product to me.  I am LOVING it though.  It smells AMAZING to start with.  Then it works in place of my super skinny serum when I don't want those hard to dissolve silicones and means I can air dry my hair and still have it be very nice and smooth.

  • Silk Elements: Mega Sile Olive Heat Protection Spray-  I have changed heat protectants!  I got this as a sample and with my new platinum hair, this makes any heat styling into silky perfection.  It makes your hair seem very oily when you first apply it, but after you heat style it leaves your hair PERFECTION!  Just be sure as you are blow drying that you keep the drier far enough away that the product doesn't smoke.  If your hair is already dry, apply this product and let it sit on the hair a few minutes before curling or straightening to make sure it doesn't smoke as well.  I'm not sure if the smoking is bad for your hair but it seems like not a good thing right?  If you have more information on this product smoking, please comment below!
  • Sebastian: Shaper Plus Hairspray-  I rarely use heat to curl, but when I do, find this to be best to hold my curls and not make them crunchy.  No white residue either.  You can brush through the curls and there will be no icky flakes.  My curls can last days though! Hooray!

WOW! I think you are fully updated now.  All my hair posts are available if you click the "hair posts" tab above or follow one of the tag link!

Thank you for reading and as always,

Shine & Sparkle!

Monday, March 21, 2016

Vegan Vanilla Mug Muffin


Greetings Sparklers,

Sorry I have not updated in a while.  But I recently got a sponsored offer to review Country Crock Buttery Spread*.  I'm usually a natural product kind of gal, but when life throws you free buttery spread, you might as well check it out right?   Compared to margarine *health-nut crowd boos loudly* this buttery spread has a smaller ingredient list and boasts being:

  • Gluten Free
  • 0g Trans Fat
  • No Partially Hydrogenated Oils
  • No Cholesterol 

I personally verified all the ingredients and I am also pleased to tell you that this product is vegan and  therefore also great for those who are lactose intolerant!  I was pretty impressed with the texture and rich buttery taste.  If you can't eat regular butter for some reason, this is a pretty great alternative!  With only 45 calories per tablespoon in the extra calcium/vitamin D version (like the one I got) it is pretty diet friendly as well.  It also comes in Original, Churn-style, or Light.  Also, at less than $4 ($3 on sale!) for 45oz, this is a very economic buttery option for those trying to save their pennies.


I couldn't leave you with a review of buttery spread without a recipe so here is one of my favorite quick and microwave friendly desserts!

Vegan Vanilla Mug Muffin:

Ingredients:

  • 4 Tablespoons flour
  • ½ teaspoon baking powder
  • 3 Tablespoons sugar
  • ½ Tablespoon Country Crock Buttery Spread
  • 4 Tablespoons vanilla almond or soy milk
  • ½ teaspoon vanilla extract
  • Pinch of salt
  • Add ins (optional): Chocolate chips, berries, nuts, etc.

Instructions:

  1. Mix all ingredients in a bowl.
  2. Pour into greased mug (at least 16 oz mug to prevent overflow).
  3. Sprinkle a few optional add-ins on top of the the mix.
  4. Microwave on high for 1 minute 30 seconds (or 90 seconds) depending on the power of your microwave.


Hope you enjoyed this post!

Shine & Sparkle! 


*Hopefully it is obvious by the whole introduction to this post, but this is actually a sponsored post (so excited)! I received these products to review complementary from the company that produced them.  However, I have not received any additional monetary compensation other than the opportunity to try them and give you my honest thoughts.

Thursday, January 21, 2016

I'm Engaged!

Hi Sparklers!

Long time no chat.  I'm sorry that I haven't had time to update you all in a while, but here I am with a quick update about how I just got engaged!!!!! Sorry (not sorry) about all the exclamation marks.

So really quickly,  if you are completely uninterested in any post-able thoughts/updates I have on the wedding process feel free to just not read any of the Ms. (future Mrs.) Sparkles posts.

Future Mr. Sparkles just proposed Saturday so I'm still in glowing-mode and trying not to stress about the upcoming year of planning this thing.  But I'm pretty organized so I'm feeling good about it.  One resource I've been really loving is my "A Practical Wedding Planner" which was written by the amazing blogger of the blog A Practical Wedding: Blog.  If you are planning a wedding I highly recommend it.

That is my big announcement and all I have for now.  But hopefully more to come!

Shine & Sparkle!

Wednesday, October 14, 2015

How to Dry Nail Polish Faster

Hi Sparklers!

I wanted to give you a quick tip this week that isn't about the Shine & Sparkle Report Jewelry Store!

For this quick tip I wanted to give you my 3 top tips for making each layer of nail polish dry faster. O previously did a post on how to give yourself a a salon-perfect manicure and other nail posts.


#1: Dip Nails in Ice-Cold Water:

Get a bowl of ice-cold water (no ice in it please, it will bump your nail polish!).  Dip your fingertips in it for about 30 seconds-1 minute (don't leave it in too long, you don't want it to hurt!).  Let your nails air dry. By the time the water dries, so will that layer of nail polish!

#2: Fan/Hair Dryer:

If water doesn't sound like your style, you can use a fan or hair dryer to increase air flow around the nail polish to dry it faster.  Just make sure the air is cold not hot!  Hot air will cause bubbling and will actually slow down the drying process.

#3: Nail Drying Spray/Drops:

While this seems like a great option, it really isn't as "instant" as they say it is.  I would still try and use tip #1 or #2 in between coats then spray after your top coat to seal in your nail polish because it will make nails sticky.  Hold the can about 5 in. away and spray the entire nail for 3 seconds (Make sure you don't hold the can too close, it will make your fingers freeze).  You are still going to have to sit for 10-15 mins to fully dry.  I would still be careful trying to do things like get dressed or do a lot right after the top is dry because the polish can still slide since the layers below are not as dry.  Overall, I like the Demert Nail Enamel Dryer* because it is inexpensive and effective.  Nail drying oil drops are essentially the same as spray, however it leaves your nails oily afterwards and applying drops of oil on your nails is a lot messier than a spray.  I personally prefer the spray, but feel free to use drops.  I've used O.P.I Drip Dry and found it acceptable as well.


I hope this quick tip helped you out!  Thank you so much for reading!

As Always,

Shine & Sparkle

*I am not paid or contacted by any of the companies mentioned in this post.  These are my honest feelings and opinions.

Wednesday, September 30, 2015

Chole + Isabel: Shine & Sparkle Glam Collection

Hi Sparklers!

Today I want to give you my first review to introduce you to one of the collections of jewelry I have curated for you Sparklers in the Shine & Sparkle Report Jewelry Store*!

I will be doing a series of posts about the collections of jewelry I've created, as well as from time-to-time introducing you to new collections or my favorite pieces.

As you can probably see from the title of this post, today, I'm going to be focusing on my favorite collection for obvious reasons-- Shine & Sparkle Glam!


This collection was inspired by my love of shiny and sparkly things (if this blog is any indication).  I was inspired by this blog to create this collection of jewelry that has lots of bling and a bit of a vintage-Hollywood feel.  I wanted these pieces to scream "Susan Sparkles".  I tried to put the things featured here at the top of the boutique, but you can easily use the "Search" boxes to see other color selections if you type in the name of a piece! Though I love all the pieces I picked for this collection, I'll highlight some of my personal favorites below:


If you are looking for a timeless and elegant piece of bling, this is one of my favorites.  I love it in this peach, champagne, and coral color combination with the antique plating--but it also comes in other great color combinations like Plum, Topaz, and Lavender as well as Teal .   These pieces have a wonderful high quality weight to them an exceptional detailing.  I love that this necklace has a little c+i bird at the end of the chain.  The bird even has a crystal for an eye.  Talk about detail!
  • antique rhodium-plated
  • nickel-free plating
  • 18" approx. length + 2" extender
  • lobster clasp
  • peach + champagne glass, coral resin


If you are looking for something more mid-range in price but still awesomely glam, this is on of my go-to pieces. It also feels luxurious to wear and can fit any personality.  I like that this can easily add a bit of sparkle to a day-time look and fit seamlessly into a full evening outfit--it's also fun to stack with other bracelets!  While I'm into the classic all silver look, this bracelet is also available plated in antique brass  or with blush glass crystals. Of course you can get matching earrings ($28) and matching necklace ($58) if you are into having a complete set of things.  These are easily found in the Shine & Sparkle Glam Collection in my store.
  • shiny rhodium-plated
  • nickel-free plating
  • 6.75" - 7.75" approx. length
  • toggle closure
  • clear glass


If you have less than $25 USD to spend on high-quality and Shine & Sparkle Report approved jewelry pieces, never fear! There are tons of earrings and rings that meet your needs.  However, I think one of the coolest items below $25 in the Shine & Sparkle Glam collection are these Celestial Frost Hair Pins.  These are perfect for going out this winter to see the Nutcracker.  You can also use them to spice up your usual hair styles with virtually no effort.  Pin back your bangs with these and your pony-tail is immediately super sparkle-tastic.  I love the art deco feel to these, it just screams glam!
  • antique rhodium-plated
  • nickel-free plating
  • 2" hair pins
  • light peach, crytsal AB + clear crystal


 I hope you enjoyed a bit more reporting on my Shine & Sparkle Glam Jewelry Collection!  Hopefully, you will like this series and think about adding some of these great pieces of sparkle to your own collections.  And don't worry, there will be plenty of your regularly scheduled blogging will be happening.  

As Always,
Shine & Sparkle

*The pictures from this blog post are from the Chloe + Isabel website.  I am compensated a percentage for each piece of jewelry sold.  However, I truly believe in these products and would never suggest you get something that I'm not 100% satisfied with myself--read more about my involvement with c+i here.


Monday, September 21, 2015

Chloe + Isabel: The Shine and Sparkle Report Jewelry Store Grand Opening

Hi Sparklers!

I'm SO SO SO excited to be announcing that The Shine & Sparkle Report is growing up and getting it's own Jewelry Store!  So excited that I'm posting for this week early.

If you don't want to hear me ramble about how much I love the quality and price points of the collections I hand picked for you Sparklers, Click the image below:


So how does The Shine & Sparkle Report Jewelry Store work?

Basically, I'm a merchandiser for Chloe + Isabel (c+i).  I have hand selected collections of amazing jewelry for you in my boutique.  When you purchase fashion jewelry pieces, I get a small portion of the profits to help further this blog!  For example, right now I'm featuring the following collections:

Shine & Sparkle Glam (my personal favorite!)


Sculpted Essentials


Vintage Inspired


c+i Best Sellers


Why am I so passionate about representing jewelry by Chloe + Isabel?

You know Ms. Sparkles, I never would put my name on anything I don't fully love and support!  I have received 14 sample pieces and I can tell you that this is hands-down, some of the most beautiful and high quality fashion jewelry I have ever owned.  I love that these pieces are finely-detailed and affordable!  Also, this jewelry is unique to c+i, so you won't be wearing the same thing as anyone else.
  • Each piece is hand-designed in the NYC studio (and produced at the same location that does jewelry for Neiman Marcus and other top designers), 
  • Each piece has incredible detail--branded with signature c+i closures (a little bird with crystal eye), and packaged in keepsake pouches.
  • All of jewelry is hypoallergenic, nickel-free, and lead safe (this is a Ms. Sparkles MUST!  I'm very allergic to earrings that are not surgical steel.  Luckily, all earrings from c+i are surgical steel and safe for me!)
  • Each piece has a lifetime replacement (if stones/crystals fall out, clasps break, etc) and 30-day money back guarantee.
  • From timeless to fashion-driven, pieces start at just $18!  
Because c+i take out the middle man and sell directly through merchandisers like me, the prices for very high quality fashion jewelry can be kept really low.  Most jewelry from c+i is made with high quality metals (like gold or silver), real crystals or semi-precious stones, and has gone through a rigorous quality control process.  Seriously, they throw and drop the pieces and man-handle them to make sure each pieces is durable as well as beautiful.

 I also just love that all the pieces are modern and perfect to fit any style.  From super intricate glam necklaces to simple birthstone stud earrings, there is something for everyone.  There is even a charm bracelet collection for all you charm lovers!

So enough rambling on about how excited I am to be representing and bringing Chole+Isabel jewelry to you.  I think you need to click the banner below and do some online shopping!


As Always,

Shine & Sparkle!

Quick Disclaimer: Unfortunately c+i can only ship domestically in the United States right now.  But I'll let you know as soon as this changes...I want all my international Sparklers to have a chance to get their hands on this stuff!

Monday, September 14, 2015

The Best Moisturizer/Sunscreen Combination Products

Hi Sunshine Sparklers!

It is bright and sunny in Northern California during our September Summer.  I am also realizing lately that I'm going on 30 years old and I'm going to have to step up my sun protection game in order to fight signs of aging.  So today I want to talk about my top 2 daily moisturizers that also have SPF (Sun Protection Factor--how many of you knew that SPF mean't this?)


Depending on how much sun I'm going to see that day, I choose one of these 2 moisturizer/sunscreen products when I do my skin care routine in the morning.

I will say that Supergoop* is better for when my skin is feeling extra dry.  Otherwise, I like to add a quick layer of powder to reduce the dewy look a bit.  If you like glowing dewy skin, this is the sunscreen for you.

Sorry this post is so quick and late.  Longer report-style posts coming soon!

As always,

Shine & Sparkle!


*I am not paid or contacted by any of the companies mentioned in this post.  These are my honest feelings and opinions.

Wednesday, August 26, 2015

Make-Up 101: Smokey Eye Make-Up Tutorial

Hi Shine and Sparkle Report Readers!

I recently did this blue smokey eye make-up look below and posted it on my instagram (which forwards to my facebook and twitter feeds--shameless hint to follow me on social media).


I actually got a few comments on this and thought that for this weeks post, I'd let you know what products I used to get this look (with little mini reviews of the products).  It's also a general report on how to get a smokey eye look.  Lots of people are trying out the blue smokey eye since the overrated Kim Kardashian wore it in a recent post.  However, feel free to be creative with your colors!

Here is a great eyeshadow diagram from nerdygirlmakeup.com* (so you know what I'm talking about in the instructions I give.  I also like that she has monolids (like me!) so it is easy to compare to my make up look.  Check out her post for all the basics to apply eyeshadow like a pro!
nerdygirlmakeup.com is the source for this picture. If this credit isn't good enough, I'll gladly take it down! But it's just so useful to not reinvent the wheel on my blog when great blogger have done it before me...#amitoolazy?

Step-By-Step Blue Smokey Eye:

  1. Base of eyeshadow primer all over my eye area (up to the brow and even below my eye.  I like  Urban Decay Anti-Aging Primer Potion.  I love this stuff.  It's a bit pricey at $24 but it works great and I can't deny that I'm sucked in by the idea of not needing an eye cream on heavy eyeshadow days because of this product.  Killing two birds with one stone.  Hurzah.
  2. Covered my whole upper eye area with a wash of white eyeshadow (up to the brow) to make sure everything applies smoothly for the following steps.  I used Make Up Geek shadow in "White Lies" but any matte white shadow you like is fine.  
  3. Water proof dark blue eyeliner on the lid.  I used this as an additional base to make sure my shadow stayed exactly where I wanted it and to maximize the pigmentation on the lid.  I used the Marcelle Mini Waterproof Liner in "Blue Lagoon" because I got it in my BirchBox.  But again, any navy blue, waterproof liner will work great.
  4. Set with navy blue matte eye shadow.  More insurance that this bold eye look doesn't turn into a blue raccoon eyes/looking like you got punched in the face.  I use a blue powder eye shadow to set this.  I didn't want to spend a whole ton of money on blue matte shadow so I used a cheap one I had that I don't think is made anymore because I can't find it on google.  But you get the idea.
  5. Blend black matte eye shadow into the outer-v and crease.  This is a bit tricky.  It takes some practice to learn your eye shape and how to best blend the outer-v and crease to look right.  Start with less product and build up.  I used Make Up Geek shadow in "Corrupt".
  6. Used Highlight to highlight inner corner, tear duct, brow bone, and further blend the black.  To do this I used Make Up Geek shadow in "Shimma Shimma".
  7. Slightly Winged Liner on Upper and Lower Lash Line.  I used my all time favorite long wearing liquid liner for monolids by Clio (post here!).
  8. Blue eyeliner in the waterline.  I used the same liner as in Step 3 to line my water line.
  9. Curl Lashes. I might do a post on this in the future.  For right now, this is already a long post!
  10. Mascara.  I have a post on this! Phew!
  11. Done. 
The great thing about this Make-Up 101 post is that you can be as creative as you'd like with colors!  Have fun and experiment with this way of getting a smokey eye.  Hope you found this post interesting and as always,

Shine & Sparkle!

*I am not paid or contacted by any of the companies mentioned in this post.  These are my honest feelings and opinions.

Wednesday, August 19, 2015

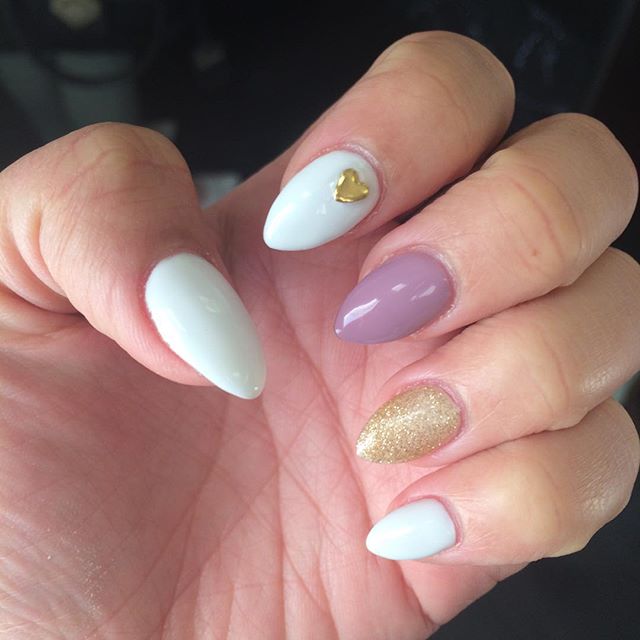
How To Keep Natural Nails Healthy Under Acrylic Nails

WAZZZUPPPP Sparklers?

I just wanted to shoot you a quick tip about keeping your natural nails healthy even when you have acrylic nails over them.


If you follow me on Instagram, you have probably seen this picture and all of my past pictures since I got addicted to getting my nails done at the salon again.  

I recently got asked this question:  "Acrylic nails look great and are great if it is hard for you to naturally grow out your nails, but is getting acrylic nails bad for your real nails?"

In a nutshell, the answer is: Yes, some of your natural nail gets filed away to keep the acrylic nail looking natural on your fingers and covering your natural nail so that it doesn't breathe or get moisture as well as is normal are not great for your natural nail.  

BUT...you can minimize the damage by taking the following steps!

#1-Don't Use Them As Tools:
Acrylic nails are much stronger than your real nails.  It is very tempting to start using them to open soda cans, try to retighten bolts on furniture, and all kinds of other things that put way more stress on your natural nail than what they were built for.  This can result in severely damaging your real nails, or even ripping off your real nail all together! EEEEK!  Long story short, baby them, even if they feel super strong.

#2- Have Them Professionally Removed (by the same salon that did them):
It is tempting to not spend the money to remove acrylic nails at the salon when you are ready to be done with them.  I highly caution against this.  While there are many tutorials on YouTube, there is no replacement for a professional who will know the best method for the products that they used.  Also, I know I have damaged my nails horribly even when I do it the "right way" in tutorials.  It is worth it to go into the pros.

#3- Oil Your Cuticles & Under Your Nails:
While water still is the enemy with acrylic nails lifting (just like polish), you can safely and effectively keep your nails hydrated by applying oil to the cuticle/nail bed and under your nails as often as possible. The only place your real nails can access moisture is at the cuticle/nail bed and underside of your nails when the tops are covered in acrylic.  It is important to keep these as moisturized as possible.  I like to soak/cover them in oil after I get out of the shower.  My favorite is using the dropper than comes with my 100% pure argan oil to apply just the right amount.  But coconut oil, olive oil, jojoba and vitamin e oil work well too.  I massage the oil all over concentrating on the underside and cuticle areas.  I like to do this before bed so it can sit on my hands over night, or I let it sit for as long as possible before I have to wash my hands.  I like to follow up oiling with lotion for extra moisture.

I know, it seems a little high maintenance, but hey...you signed up with high maintenance with acrylic nails with the bi-weekly fills anyway *wink*  Hope this helped and...

As Always,

Shine & Sparkle!

Wednesday, August 12, 2015

3 Healthy Chicken Marinades

Hi Sparklers!


Again, I'm so sorry about the infrequent updates but life throws you curve balls and sometimes you just have to roll with it.  That being said, we a full force into summer.  This means BBQ time!  I recently had a request for my chicken marinade recipes so I thought I would share these 3 marinade recipes to keep your healthy eating interesting (those boneless/skinless chicken breasts get awful boring without fun bold flavors!).  I also really wanted to do this post because I have noticed that a lot of marinade recipes online are not strong enough to impart a lot of flavor into the meat.  I really like my marinades to be strong and bold so that once the meat gets cooked, it really has a lot of flavor, rather than just a hint of taste.

Each of these marinades are for 4 chicken breasts, but other pieces of chicken or other proteins can be substituted.  Squiggles would prefer if you did not eat guinea pigs.  I typically put my meat in a ziplock bag with the marinade and let it sit in the fridge for at least 2 hours, preferably overnight.  Then cook with your favorite meat-cooking method.  Mine is the BBQ! Mini-Tip:  Mix marinade before adding meat.  This way you can taste it to make sure it's delicious! 

Chinese Five-Spice Marinade:
1/2 cup soy sauce
1/4 cup water
1/4 cup shao hsing wine (or dry sherry)
1 tbs Chinese 5 spice powder
2 tbs raw sugar or honey or the sweetener equivalent
2 tsp fresh grated ginger
1 pinch of cayenne pepper
4-5 cloves of garlic (finely minced)
1 tsp white pepper

Chili-Lime Marinade:
1/2 cup lime juice
1/2 jalapeno finely diced (taste a small piece of the pepper before adding to the marinade to make sure it is not too spicy!  Add less if it is very hot, add more if you love the heat!)
2 tsp onion powder
1 tbs chili powder
1 pinch of cayenne pepper
4-5 cloves of garlic finely minced
2 tsp salt
2 tsp black pepper

Lemon-Turmeric Marinade:
1/2 cup lemon juice
1 tbs turmeric
2 tsp onion powder
1 pinch of cayenne pepper
4-5 cloves of garlic finely minced
2 tsp salt
2 tsp black pepper

I hope you try out these recipes and I also hope that you do not take Squiggle's advice on healthy eating...unless you are a guinea pig.

As Always,

Shine & Sparkle!

Wednesday, August 5, 2015

Make-Up 101: How to Apply Mascara to Get Different Effects

Greetings Shine and Sparkle Report Readers!

It's been too long since I did a "Make Up 101" report.  I really wanted to get into talking about how to apply mascara to achieve the effect you want. I did do a Basic Report of Mascara waaay back in the day.  Like the little paint drawing? Yeah it's cute.  Even though this is more of a technique post than one about what brands work best, I will be telling what brands I used in the pictures in case you are curious.  Anyway, there are lots of tricks to share about using mascara, so lets get straight into it.

Natural Look:
For a natural look you want to have you lashes look like natural lashes but a bit longer and a bit more full.  Depending on your natural lashes, you might not even need mascara for this!  You might just need a good eyelash curler.  My favorite is the Shiseido Eyelash Curler*.  If your lashes are already long and the hairs not to coarse, just curling them might give you just the extra natural boost you are looking for.  For a little more impact or to hold the curl in coarse lashes, top it off with a water proof mascara.  Brushing from the base of underside of the top lashes up.  Wiggle the brush into the base a little before brushing up to really help distribute product evenly.  Same with brushing the top side of your lower lashes.  If you have very very sparse lower lashes or want less drama, you might consider not applying mascara to the bottom lashes.

Medium Drama Look:
For this look I would highly recommend curling the lashes.  I then would set the curl in place by applying a water proof mascara to the top lashes.  Then I would apply a second coat of mascara that does not smudge (waterproof or non-waterproof, depending on the weather and your preference).  For this look I also tend to take my "Maybelline Lash Discovery Mini-Brush Mascara" (because my lashes are too small to do this with a regular mascara wand) and also apply mascara to the top side of my upper lashes and bottom side of my lower lashes.  This is to ensure that all possible lash surfaces are coated in mascara. Also, applying mascara with the wand position vertical (rather than the typical horizontal) can result in more product delivery to your lashes if you feel like it needs more oomph.

Seen here: Curled lashes with with one layer of Maybelline Rocket Volume Waterproof mascara on top lashes.  Layer of Maybelline Lash Discovery Mini-Brush Mascara on both sides of upper and lower lashes afterwards.  I also like using Benefit's "Yes They're Real" mascara when I'm doing the vertical trick because the mascara brush has points all over the tip of the brush. It's pretty cool.

Max Drama Look:
Follow Medium Drama Steps above.  Then apply fake lashes.  Fake lasshes are a whole world of fun!  There are tons of styles and brands.  You can be as subtle or dramatic as you desire.  I tend to prefer thin/invisible bands on the base of my lashes for maximum comfort.  Make sure to blend real and fake lashes with a quick swipe of any non-waterproof mascara.

Mini Tip: My current favorite lashes Ardell Glamour in "Wispies-Black".  I find Ardell to have great and comfortable lashes quite affordability for under $4 a pair.  M.A.C and Benefit also have excellent lashes but they are $15 a pair.  If you are tempted to order 10+ Pairs for less than $2 off of ebay from China, I would caution against it.  They aren't dangerous but they are really uncomfortable.  They also do not stand up to re-use (see my post on "Fake Lash Quick Tips".)

Ah another successful full length, report style Make-Up 101 post.  I'm so happy that I have had time to put another one of these together for you all!  Hopefully you found it helpful! Please feel free to comment or ask any questions!  I love hearing from you.


As Always,
Shine & Sparkle


*I am not paid or contacted by any of the companies mentioned in this post.  These are my honest feelings and opinions.

Wednesday, July 29, 2015

Hacks To Make Instant Ramen Noodles Healthy/Healthier

It's a great day for some noodles my lovely Sparklers!

As many of my friends and family know, I LOVE noodles.  While I love all types of noodles, one of my #1 comfort foods is instant ramen.  The type when you boil a block of dried noodles and add in a foil packet of powder.  These noodles are very familiar to those on a budget or who generally are not great at cooking.  Cooking wise, my blog tends to focus on healthy recipes.  So I thought I would share with you my favorite healthier instant noodle hacks.  They add a lot more nutrition and fiber.  Admittedly, these take a little longer than just whipping up the noodles per the directions, however they take under 15 minutes I promise!

I'm eating this healthier bowl of chicken flavored styrofoam-cup noodles as I type this post...for breakfast.  It has fish-cake, sprouted tofu, frozen peas, and frozen chopped spinach added.  Mmmm...    


Lets start with the basics.  There are 2 primary formats for instant noodles, the traditional kind where you cook it in boiling water on the stove and the type where you just add water to the styrofoam cup.  I have listed my favorite health hacks for each one:

1) Traditional Boil-In-Pot:

  • Boil 2 pots of water or 1 pot for cooking and a kettle of extra hot water.
  • In 1st pot, cook the block of noodles 1 minute LESS than the instructions.  Drain out the unhealthy the starchy and oily water (did you know instant noodles are deep fried to make them dry?).
  • Rinse the noodles in cold water to remove excess oil and to stop the cooking process.
  • In the 2nd pot (or rinse and reuse the first pot), add the seasoning packet(s) and however much boiling water you like to achieve the saltyness of broth you like.  This is usually about 1-1.5 cups of water.  
  • Heat up healthy add-ins in the broth (or sautee in the pot before adding hot water/broth). My favorite add ins to heat up include:

    • Proteins- (Chicken, Beef, Fish Cake, Shrimp, Tofu...)  Any leftover proteins from another meal can be added.  If the flavor on the leftovers doesn't work with the noodles you want to make, you can rinse or boil the protein back to being more neutral in flavor.  It's a great way not to waste food!
    • Eggs- I love eggs in my ramen.  You can either scramble or fry them then add on top, add to beaten egg slowly while stirring to boiling pot to get egg-drop soup, or carefully drop a whole egg into the boiling broth without stirring to get a poached egg.  
    • Veggies- I tend to go for frozen veggies because they are quick and easy (and that is what we are going for with ramen right?  My favorites include--Spinach, peas, corn, carrots, and broccoli.  If you feel like adding fresh veggies, be my guest!
    • Fiber Powder- While adding protein and veggies is great, a little extra fiber never hurt to add to the very refined carbohydrates of the noodles.  It also blends seamlessly with this dish.  You wont even notice that it is there if you get the flavorless dissolving kind.   
  • Add back in your noodles to the hot broth and add-in and cook for the remaining minute of cook time.
  • Put in a bowl and enjoy your (less) guilty pleasure meal!

2) Just Add Water To Styrofoam Cup:

  • Start by boiling water to hydrate the noodles.
  • Heat up healthy add-ins in a separate pot.  Saute them in a little coconut or olive oil.   
    • Egg-Tip: because you do not have a boiling pot of broth, if you will have to poach eggs separately if you really want a poached egg.  I suggest dropping a whole egg into a mug of water and microwaving it between 30 seconds to 1.5 minutes for different stages of runny yolk.  2 minutes gets you a perfectly hard yolk.
  • Add the boiling water to the cup of noodles, after your add-ins are sufficiently heated through.  Let it sit for 1 minute LESS than the instructions, then pour it into your hot pot of add-ins.  Let it heat for the remaining minute with your add-ins. 
  • Put in a bowl.  Eat instant ramen noodles because they are so tasty now!
3) Extra Health-ifying Ramen Hacks:
  • Don't Drink The Soup- Since you cannot control the amount of seasoning in this format of instant noodles, I suggest limiting the amount of soup you drink.  I find that I'm perfectly satisfied just eating the contents of my noodle soup without drinking too much or the actual broth.  The extra consumption of salt and preservatives isn't worth it to me and I still get the flavor when I eat the best part...the noodles!  I understand if this isn't acceptable to you, in which case I suggest drinking a lot of water before and after to try and flush out some of the salt. 
  • Don't Be Afraid- Creativity with instant noodles is a must, and since the base of the dish is so inexpensive, why not try something new?  Some other fun things I have seen done include topping it with cheese, stir-frying the cooked noodles with the seasoning or extra sauces, even turning the noodles into burger buns!  Whatever you decide, be mindful of the salt content of the seasoning packets and try to add some healthy proteins and veggies.

I hope you enjoyed this post on one of my favorite foods.  Be healthy and as always,


Shine & Sparkle!