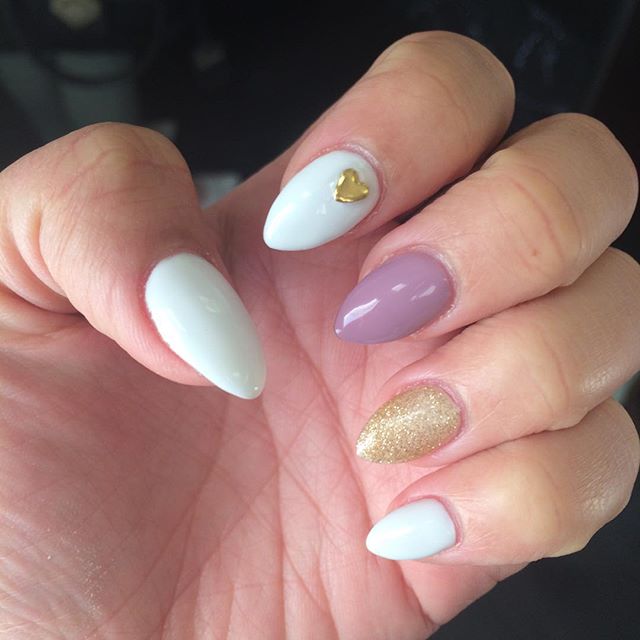
Hi Sparklers!
I wanted to give you a quick tip this week that isn't about the Shine & Sparkle Report Jewelry Store!
For this quick tip I wanted to give you my 3 top tips for making each layer of nail polish dry faster. O previously did a post on how to give yourself a a salon-perfect manicure and other nail posts.
#1: Dip Nails in Ice-Cold Water:
Get a bowl of ice-cold water (no ice in it please, it will bump your nail polish!). Dip your fingertips in it for about 30 seconds-1 minute (don't leave it in too long, you don't want it to hurt!). Let your nails air dry. By the time the water dries, so will that layer of nail polish!
#2: Fan/Hair Dryer:
If water doesn't sound like your style, you can use a fan or hair dryer to increase air flow around the nail polish to dry it faster. Just make sure the air is cold not hot! Hot air will cause bubbling and will actually slow down the drying process.
#3: Nail Drying Spray/Drops:
While this seems like a great option, it really isn't as "instant" as they say it is. I would still try and use tip #1 or #2 in between coats then spray after your top coat to seal in your nail polish because it will make nails sticky. Hold the can about 5 in. away and spray the entire nail for 3 seconds (Make sure you don't hold the can too close, it will make your fingers freeze). You are still going to have to sit for 10-15 mins to fully dry. I would still be careful trying to do things like get dressed or do a lot right after the top is dry because the polish can still slide since the layers below are not as dry. Overall, I like the Demert Nail Enamel Dryer* because it is inexpensive and effective. Nail drying oil drops are essentially the same as spray, however it leaves your nails oily afterwards and applying drops of oil on your nails is a lot messier than a spray. I personally prefer the spray, but feel free to use drops. I've used O.P.I Drip Dry and found it acceptable as well.
I hope this quick tip helped you out! Thank you so much for reading!
As Always,
Shine & Sparkle
*I am not paid or contacted by any of the companies mentioned in this post. These are my honest feelings and opinions.
Explore SSR Topics
Showing posts with label Quick Tips. Show all posts
Wednesday, October 14, 2015
Wednesday, August 19, 2015
How To Keep Natural Nails Healthy Under Acrylic Nails
WAZZZUPPPP Sparklers?
I just wanted to shoot you a quick tip about keeping your natural nails healthy even when you have acrylic nails over them.
If you follow me on Instagram, you have probably seen this picture and all of my past pictures since I got addicted to getting my nails done at the salon again.
I recently got asked this question: "Acrylic nails look great and are great if it is hard for you to naturally grow out your nails, but is getting acrylic nails bad for your real nails?"
In a nutshell, the answer is: Yes, some of your natural nail gets filed away to keep the acrylic nail looking natural on your fingers and covering your natural nail so that it doesn't breathe or get moisture as well as is normal are not great for your natural nail.
BUT...you can minimize the damage by taking the following steps!
#1-Don't Use Them As Tools:
Acrylic nails are much stronger than your real nails. It is very tempting to start using them to open soda cans, try to retighten bolts on furniture, and all kinds of other things that put way more stress on your natural nail than what they were built for. This can result in severely damaging your real nails, or even ripping off your real nail all together! EEEEK! Long story short, baby them, even if they feel super strong.
#2- Have Them Professionally Removed (by the same salon that did them):
It is tempting to not spend the money to remove acrylic nails at the salon when you are ready to be done with them. I highly caution against this. While there are many tutorials on YouTube, there is no replacement for a professional who will know the best method for the products that they used. Also, I know I have damaged my nails horribly even when I do it the "right way" in tutorials. It is worth it to go into the pros.
#3- Oil Your Cuticles & Under Your Nails:
While water still is the enemy with acrylic nails lifting (just like polish), you can safely and effectively keep your nails hydrated by applying oil to the cuticle/nail bed and under your nails as often as possible. The only place your real nails can access moisture is at the cuticle/nail bed and underside of your nails when the tops are covered in acrylic. It is important to keep these as moisturized as possible. I like to soak/cover them in oil after I get out of the shower. My favorite is using the dropper than comes with my 100% pure argan oil to apply just the right amount. But coconut oil, olive oil, jojoba and vitamin e oil work well too. I massage the oil all over concentrating on the underside and cuticle areas. I like to do this before bed so it can sit on my hands over night, or I let it sit for as long as possible before I have to wash my hands. I like to follow up oiling with lotion for extra moisture.
I know, it seems a little high maintenance, but hey...you signed up with high maintenance with acrylic nails with the bi-weekly fills anyway *wink* Hope this helped and...
As Always,
Shine & Sparkle!
Wednesday, July 22, 2015
4 Quick Tips on Wearing False/Fake Lashes
Hi Sparklers!
This week I have a very quick post with some of my quick tips about wearing falselashes. If you want to know how to apply false/fake lashes, video is a much better platform that a blog post and I encourage you to look it up on YouTube *wink*.
P.S. Does Fake or False sound better when talking about lashes that are not your own? Humm...
Without wasting a lot of time, below are my top 4 Tips on Wearing False Lashes!
![]() |
| *see below |
1. Trim the lashes. Don't be afraid to trim them to fit your eye size. I have little eyes and have to take off at least 1/4 an inch from any false lashes. If you do this, cut from the outer end of the lash. You want to make sure the shortest lashes are at the inner corner of your eye.
2. Use a good lash glue. My favorite lash glue is Kiss Ever EZ Lashes Strip Lash Adhesive*. Many people like the Duo Eyelash Glues, but I find they hold almost too well and can rip out what little lash I have naturally, even when removed properly. The trick with the Kiss glue is to let it set for a a full 30 seconds to 1 minute before applying to make sure the glue is tacky. Apply the lash, then use some powder eyeshadow or transparent powder to set the glue after waiting for it dry. Don't open your eye before you set the glue with powder or it wont stick.
3. Remove lashes carefully. Always remove false eyelashes gently by applying an oil based make-up remover (or coconut or oilve oil) to a cottton pad. Leave it on the eye for 30 seconds then gently remove. Ripping them off can be painful, or pull out real lashes.
4. Reuse your lashes. Use false lashes more than once! Place them on a tissue, pour some isopropyl alcohol over the lashes, gently pat the lashes with alcohol soaked tissue to sterilize and gently remove extra mascara or eyelash glue. Wait until it is completely dry to reuse! Alcohol in the eye=bad news.
I hope you enjoyed this quick tip,
Shine & Sparkle!
*I am not paid or contacted by any of the companies mentioned in this post. These are my honest feelings and opinions. Like all my images not generated by myself, I'll gladly give someone credit for their image or take it down if someone throws a hissy fit.
Wednesday, May 6, 2015
How To Get Rid Of Dark Under-Arms
Sup Super Spiffy Sparklers?
I know I have been neglectful. So I'm here to make up for it with a full report post! Summer is coming, so is the season for sleeveless tops. This week's topic might be a little bit TMI, but really, this is a thing. Many girls with more pigment in their skin worry about the skin under their arms being darker than the rest of their skin. Yes, I know, this sounds insane to some but it is a major source of insecurity of others. As someone who didn't even know this was an issue, I didn't even realize I had darker under arms until I read about it on another blog (lets not talk about the "thigh-gap" thing...I'll rant your head off about how silly that one is...)
This other blog had a ton of crazy DIY tips like "put baking soda paste under your arms every other day", and "rub lemons on them every day" and a gamut of other steps to get the skin color under your arms to match that of the rest of your skin.
While I personally believe that I have other more important things to worry about (like a huge zit in the middle of my face), I did become interested if I could make my underarms lighter if I tried. And low and behold, it is possible! Who knew?! And it was actually a lot easier than I thought it would be. What are the 3 magic steps that I take to achieve matching under-arm skin color? Things I would do for hygiene purposes anyway. Having nice healthy skin under your arms is good for not only your skin, but also helps you not smell bad. Win-win.
#1: Epilate My Under Arm Hair- Yes, this is the number one thing that changed the appearance of my under arms. Basically, when I used to shave my under-arms, it would leave a little black dot of hair below the surface of the skin. This is mainly what gave the look of darker under arms. I bought an Emoji Soft Caress Corded Epilator ($60USD), and this had 2 major benefits. A) It quickly pulled the hair out at the root; B) I only have to remove my underarm hair with it once every 2 weeks or so. This can also be used on legs and they say face, but honestly, I feel it works best for me on my under arms. Other areas will depend on the thickness of your hair and pain tolerance.
For those who do not know what an epilator is, it is many electricity powered tweezers that quickly pull out hairs. I went with the corded one because it was the least expensive and I don't use it enough or long enough to care about cordless charging or bothering with batteries.
I'm not going to lie to you, the first couple of times I did it, it was a little painful, but after that, it doesn't really hurt at all. I will say that if you are very sensitive to pain, it might not be for you. Also, if you are more tolerant than I am, you might be able to use it to remove every hair on your body. But not I--said the Susan Sparkles, not I.
Mini-Tip: I like epilating because it is much more affordable than getting my underarms waxed at a salon. However, if you would like to wax your under-arms, it should give the same results. If you want a totally pain free method of getting rid of hair below the surface of your skin, you can try chemical hair removers such as Nair.
#2: Exfoliate- Nothing crazy, no weird products. Just make sure you take some sort of abrasive bath object (body brush, exfoliating loofa, even an old tooth brush) and use your regular body soap to exfoliate any dead skin cells from your under arms 1-2 times a week. You could also try using a mega batch of my DIY Lip Scrub, it will work on your body too! No biggie, but it keeps the area nice and clean, free of dead skin cells. Hooray! Really, no need to use steal wool or sand paper guys, just exfoliate.
#3: Tone/Moisturize- If you have a toner for your face (which I highly recommend as part of your skin care routine-I talk about mine in my dealing with oily skin post) use it on your under arms as needed. If you don't have a toner or you want a cheaper option, drugstore isopropyl alcohol can also work. Do this after exfoliating to remove any dirt/impurities/leftover deodorant in the skin. It will also help with body odor. Hooray! After this, take your favorite lotion and put some under your arms as well.
So there you have it, basically, take good care of the skin under your arms and it will most likely be lighter in color. If this does not work, it is possible, that genetically, your skin is just darker under your arms. My tip if this is the case is to be comfortable and confident. Do not let something small like the color of your under-arms dictate your life. Wear sleeveless shirts and reach for the peanut butter on the top shelf. Wear a swimsuit and play volley ball on the beach! I'm sure that if you carry yourself with pride and are living life to the fullest, nobody will be worried about the color of the skin under your arms. While in the beauty world we try and alter and enhance ourselves so that we are the most confident in ourselves, I think it is important to embrace what we have and try not to be too critical of ourselves.
As Always,
Shine & Sparkle!
*I am not paid or contacted by any of the companies mentioned in this post. These are my honest feelings and opinions
I know I have been neglectful. So I'm here to make up for it with a full report post! Summer is coming, so is the season for sleeveless tops. This week's topic might be a little bit TMI, but really, this is a thing. Many girls with more pigment in their skin worry about the skin under their arms being darker than the rest of their skin. Yes, I know, this sounds insane to some but it is a major source of insecurity of others. As someone who didn't even know this was an issue, I didn't even realize I had darker under arms until I read about it on another blog (lets not talk about the "thigh-gap" thing...I'll rant your head off about how silly that one is...)
This other blog had a ton of crazy DIY tips like "put baking soda paste under your arms every other day", and "rub lemons on them every day" and a gamut of other steps to get the skin color under your arms to match that of the rest of your skin.
While I personally believe that I have other more important things to worry about (like a huge zit in the middle of my face), I did become interested if I could make my underarms lighter if I tried. And low and behold, it is possible! Who knew?! And it was actually a lot easier than I thought it would be. What are the 3 magic steps that I take to achieve matching under-arm skin color? Things I would do for hygiene purposes anyway. Having nice healthy skin under your arms is good for not only your skin, but also helps you not smell bad. Win-win.
#1: Epilate My Under Arm Hair- Yes, this is the number one thing that changed the appearance of my under arms. Basically, when I used to shave my under-arms, it would leave a little black dot of hair below the surface of the skin. This is mainly what gave the look of darker under arms. I bought an Emoji Soft Caress Corded Epilator ($60USD), and this had 2 major benefits. A) It quickly pulled the hair out at the root; B) I only have to remove my underarm hair with it once every 2 weeks or so. This can also be used on legs and they say face, but honestly, I feel it works best for me on my under arms. Other areas will depend on the thickness of your hair and pain tolerance.
For those who do not know what an epilator is, it is many electricity powered tweezers that quickly pull out hairs. I went with the corded one because it was the least expensive and I don't use it enough or long enough to care about cordless charging or bothering with batteries.
I'm not going to lie to you, the first couple of times I did it, it was a little painful, but after that, it doesn't really hurt at all. I will say that if you are very sensitive to pain, it might not be for you. Also, if you are more tolerant than I am, you might be able to use it to remove every hair on your body. But not I--said the Susan Sparkles, not I.
Mini-Tip: I like epilating because it is much more affordable than getting my underarms waxed at a salon. However, if you would like to wax your under-arms, it should give the same results. If you want a totally pain free method of getting rid of hair below the surface of your skin, you can try chemical hair removers such as Nair.
#2: Exfoliate- Nothing crazy, no weird products. Just make sure you take some sort of abrasive bath object (body brush, exfoliating loofa, even an old tooth brush) and use your regular body soap to exfoliate any dead skin cells from your under arms 1-2 times a week. You could also try using a mega batch of my DIY Lip Scrub, it will work on your body too! No biggie, but it keeps the area nice and clean, free of dead skin cells. Hooray! Really, no need to use steal wool or sand paper guys, just exfoliate.
#3: Tone/Moisturize- If you have a toner for your face (which I highly recommend as part of your skin care routine-I talk about mine in my dealing with oily skin post) use it on your under arms as needed. If you don't have a toner or you want a cheaper option, drugstore isopropyl alcohol can also work. Do this after exfoliating to remove any dirt/impurities/leftover deodorant in the skin. It will also help with body odor. Hooray! After this, take your favorite lotion and put some under your arms as well.
So there you have it, basically, take good care of the skin under your arms and it will most likely be lighter in color. If this does not work, it is possible, that genetically, your skin is just darker under your arms. My tip if this is the case is to be comfortable and confident. Do not let something small like the color of your under-arms dictate your life. Wear sleeveless shirts and reach for the peanut butter on the top shelf. Wear a swimsuit and play volley ball on the beach! I'm sure that if you carry yourself with pride and are living life to the fullest, nobody will be worried about the color of the skin under your arms. While in the beauty world we try and alter and enhance ourselves so that we are the most confident in ourselves, I think it is important to embrace what we have and try not to be too critical of ourselves.
As Always,
Shine & Sparkle!
*I am not paid or contacted by any of the companies mentioned in this post. These are my honest feelings and opinions
Wednesday, April 1, 2015
Top 5 Healthy Nail Tips
Hi Sparklers!
I know I've been MIA Sparklers. I'm so so sorry! Life has been...well life. Sometimes you have to put something you love on the back burner to make sure other parts of your life shine and sparkle too! However, lets just jump right back into it. Over Chinese New Year dinner (I realize this was ages ago...), my Aunt mentioned that she liked my Wet n' Wild Mega Last Nail Polish* Review and Comparison post. We got on to talking about how we both have weak nails that like to peel and break. I learned a tip form her which is also included! Thus, I have amassed a quick list of tips that will keep you nail tips looking in tip-top shape! (See what I did there?). Without a long intro, lets get into the tips (in no particular order).
#1: Don't Use Bar Soaps-
This is the wonderful tip that I learned from my Aunt. In order to create all bar soaps, the soap makers have to use lye. Lye is a very harsh chemical that can really affect the quality of your nails. Am I torn because I think bar soap is way more economic than liquid soap? Yes. but if you are battling naturally weak nails, switching to liquid soaps might just help maximize your chances for strong nails.
#2: Use A Base Coat-
Nail polish colors are drying to your nails no matter if it is free of the 3-5 worst chemicals (This post by SilkyPolish.com* does a good job talking about the chemicals in nail polish). Using a base coat protects the nail from all these chemicals and has beneficial ingredients that can help with strengthening, moisturizing, or growing your nails (see my how to get salon perfect nails at home post to learn more). Over time I have tried lots of brands of base coats. Most preform pretty well, how ever, one base coat is BY FAR the best I have ever used. It's a little pricey at $30 for 0.6oz, but Pink Gel Coat rocks my socks. It dries fast and my nails have never been as nice as when I started using this over a year ago. One bottle lasts a long time, so I feel like it is totally worth it. You can also use this as a top coat, which cuts down on the number of nail products you have to buy!
#3: Do Not Pick Off Polish-
I know this is super hard. Your polish is peeling up and it's so tempting just to pick it off. But you inevitably will take off some of the surface of your nail and damage it. I know, the OCD in you might not be able to stop, but try and think about which is worth more to you: strong healthy nails, or picking off polish leaving a trail of a little colored flakes.
#4: Properly Remove Your Polish-
In keeping with tip #3, please try not to use pure acetone to remove your polish. Yes it works really fast (which is why salons use it) but it is by far the most damaging to your nails. I prefer using soy nail polish remover which is actually quite good for your nails. I wrote a review of soy nail polish remover if you are interested in trying it. It's the only remover I have used for over a year and I've been very satisfied with the long term results! Always remember to wash your hands after using nail polish removers and apply a moisturizer or oil to your nails/cuticles for a few minutes before painting your nails again. This will help restore some suppleness to your nails. You'll have to use rubbing alcohol or wash your hands again before painting (since the oil/lotion will drastically reduce the life of you manicure, but even a few minutes without polish and adding moisture will help the condition of your nails a lot.
#5: Nourish From the Inside-
Your body appearance reflects your overall health. If you are not eating healthy and getting enough water, your hair, skin, and nails will be some of the first places you will show this. Make sure you are drinking enough water, and eat enough vegetables, protein, and nutrient rich foods. You might be surprised how much this improves the condition of your hair skin and nails. I'm not a huge supplement taker, but I do think a high quality daily multi-vitamin can be a good place to start.
I hope you found this post helpful, and I promise to start posting regularly again every Wednesday!
Shine & Sparkle!
*I am not paid or contacted by any of the companies mentioned in this post. These are my honest feelings and opinions. Also, like all my images, I'll gladly give someone credit for their image used in this post or take it down if someone throws a hissy fit.
I know I've been MIA Sparklers. I'm so so sorry! Life has been...well life. Sometimes you have to put something you love on the back burner to make sure other parts of your life shine and sparkle too! However, lets just jump right back into it. Over Chinese New Year dinner (I realize this was ages ago...), my Aunt mentioned that she liked my Wet n' Wild Mega Last Nail Polish* Review and Comparison post. We got on to talking about how we both have weak nails that like to peel and break. I learned a tip form her which is also included! Thus, I have amassed a quick list of tips that will keep you nail tips looking in tip-top shape! (See what I did there?). Without a long intro, lets get into the tips (in no particular order).
#1: Don't Use Bar Soaps-
This is the wonderful tip that I learned from my Aunt. In order to create all bar soaps, the soap makers have to use lye. Lye is a very harsh chemical that can really affect the quality of your nails. Am I torn because I think bar soap is way more economic than liquid soap? Yes. but if you are battling naturally weak nails, switching to liquid soaps might just help maximize your chances for strong nails.
#2: Use A Base Coat-
Nail polish colors are drying to your nails no matter if it is free of the 3-5 worst chemicals (This post by SilkyPolish.com* does a good job talking about the chemicals in nail polish). Using a base coat protects the nail from all these chemicals and has beneficial ingredients that can help with strengthening, moisturizing, or growing your nails (see my how to get salon perfect nails at home post to learn more). Over time I have tried lots of brands of base coats. Most preform pretty well, how ever, one base coat is BY FAR the best I have ever used. It's a little pricey at $30 for 0.6oz, but Pink Gel Coat rocks my socks. It dries fast and my nails have never been as nice as when I started using this over a year ago. One bottle lasts a long time, so I feel like it is totally worth it. You can also use this as a top coat, which cuts down on the number of nail products you have to buy!
#3: Do Not Pick Off Polish-
I know this is super hard. Your polish is peeling up and it's so tempting just to pick it off. But you inevitably will take off some of the surface of your nail and damage it. I know, the OCD in you might not be able to stop, but try and think about which is worth more to you: strong healthy nails, or picking off polish leaving a trail of a little colored flakes.
#4: Properly Remove Your Polish-
In keeping with tip #3, please try not to use pure acetone to remove your polish. Yes it works really fast (which is why salons use it) but it is by far the most damaging to your nails. I prefer using soy nail polish remover which is actually quite good for your nails. I wrote a review of soy nail polish remover if you are interested in trying it. It's the only remover I have used for over a year and I've been very satisfied with the long term results! Always remember to wash your hands after using nail polish removers and apply a moisturizer or oil to your nails/cuticles for a few minutes before painting your nails again. This will help restore some suppleness to your nails. You'll have to use rubbing alcohol or wash your hands again before painting (since the oil/lotion will drastically reduce the life of you manicure, but even a few minutes without polish and adding moisture will help the condition of your nails a lot.
#5: Nourish From the Inside-
Your body appearance reflects your overall health. If you are not eating healthy and getting enough water, your hair, skin, and nails will be some of the first places you will show this. Make sure you are drinking enough water, and eat enough vegetables, protein, and nutrient rich foods. You might be surprised how much this improves the condition of your hair skin and nails. I'm not a huge supplement taker, but I do think a high quality daily multi-vitamin can be a good place to start.
I hope you found this post helpful, and I promise to start posting regularly again every Wednesday!
Shine & Sparkle!
*I am not paid or contacted by any of the companies mentioned in this post. These are my honest feelings and opinions. Also, like all my images, I'll gladly give someone credit for their image used in this post or take it down if someone throws a hissy fit.
Thursday, January 22, 2015
Petroleum Jelly For Eyelash Growth
Another Week Another Post Dear Sparklers,
This week I wanted to give you a quick tip that has really been helping out my puny little lashes. In a nutshell, using mascara (especially water-proof mascara) can really dry out your lashes. This can cause them to fall out more easily or not grow as long as they used to.
I have heard various ideas from other beauty bloggers/youtubers which suggest using creams or oils gently on your lash line and lashes. This always results in me getting crazy horrible eye burning as the product inevitably gets in my eye. Eek.
There are also really expensive lash treatments that come in mascara tube form. I find that these don't really seem to make much of a difference and are simply not worth the cash.
What have I found that actually works?! Petroleum Jelly*. It's hydrating, thick enough not to get in your eyes, and very very inexpensive. Just use clean fingers or a cleaned old mascara wand to apply a drop sized amount to your lashes before going to bed. TaDa!
Hope you liked this quick tip!
Shine & Sparkle!
*I am not paid or contacted by any of the companies mentioned in this post. But seriously, I said Petroleum Jelly, not that-common-petroleum-jelly-brand-that-shall-not-be-named. These are my honest feelings and opinions.
![]() |
| Like all my images, I'll gladly give someone credit for their image or take it down if someone throws a hissy fit. |
This week I wanted to give you a quick tip that has really been helping out my puny little lashes. In a nutshell, using mascara (especially water-proof mascara) can really dry out your lashes. This can cause them to fall out more easily or not grow as long as they used to.
I have heard various ideas from other beauty bloggers/youtubers which suggest using creams or oils gently on your lash line and lashes. This always results in me getting crazy horrible eye burning as the product inevitably gets in my eye. Eek.
There are also really expensive lash treatments that come in mascara tube form. I find that these don't really seem to make much of a difference and are simply not worth the cash.
What have I found that actually works?! Petroleum Jelly*. It's hydrating, thick enough not to get in your eyes, and very very inexpensive. Just use clean fingers or a cleaned old mascara wand to apply a drop sized amount to your lashes before going to bed. TaDa!
Hope you liked this quick tip!
Shine & Sparkle!
*I am not paid or contacted by any of the companies mentioned in this post. But seriously, I said Petroleum Jelly, not that-common-petroleum-jelly-brand-that-shall-not-be-named. These are my honest feelings and opinions.
Wednesday, December 3, 2014
Face Cleansing Quick Tip
Happy Fall Devoted Shine and Sparklers!
Today I have a really quick tip about washing your face. I'm sure you never really thought about it, but here are my top tips for getting the best results from your facial cleanser!
- Wash your face at the end of your shower. As you shower you have body soaps, shampoo, conditioner, shaving cream, and all sorts of other products that might have ingredients you don't want sitting on your face. Waiting until the end of your shower to wash your face ensures that you are left with the cleanest skin possible at the end of your shower.
- Massage the cleanser into your face for 30 seconds to 1 minute in small circular motions. This seems like a long time, but to get the full benefits of your cleanser, wash your face for a bit longer than you think. This gives the cleanser time to break down oils, tighten pores, exfoliating ingredients to sluff away dead skin cells, and all the goodness of your cleanser to work.
- Dry your face with a clean towel. I actually have a number of small towels I reserve just for my face. If you don't care about the environment, you can also use a paper towel. The skin on your face tends to be more sensitive to bacteria (which can cause breakouts too!) Using a clean towel to dry your face helps reduce bacteria and leave you with the best complexion possible.
- Wash your face 2 times a day. Washing more than 2 times will dry it out. It's good to get all the environmental particles, oil and makeup off of your face at night. It's good to get all the oil and bacteria from your pillows off your face in the morning. Hooray.
I know this was a super super quick tip. But isn't that the point?
As Always,
Shine & Sparkle!
Wednesday, October 29, 2014
How to Afford Beauty Blogging
Happy Halloween Post Shine and Sparkle Readers!
I know lots of bloggers are doing scary make-up looks and costumes. However, I could think of nothing scarier than tackling the financial aspect of having a beauty blog. Sometimes I look at other beauty bloggers and youtubers and think "how do they afford to buy/review all that stuff?!" This inspired this post about some tips about how I balance things support my blogging hobby and perhaps offer some advice to bloggers who are just starting out. I also wanted to provide you with some perspective on the big name bloggers/youtubers out there. And most of all, I want to stress that if you are passionate and dedicate time and love into what you are doing, it will be far more successful than if you simply pour tons of money into it.
As a quick disclaimer: I am NOT a financial professional. I am also NOT the world's most successful blogger (though I hope to be some day!) I am just telling you what works for me and my opinion. Take my advice with a grain of salt.
1. Post Smart:
Views are money. The more views, the more likely someone will click on one of your ads (which generate revenue). I like to think that if it is something I'm interested in, someone else might be too. This means that other people might be searching the internet for it. If your post closely matches what someone is looking for, search engines are more likely to display it. Search optimization is important! Also, most of my posts about something I was going to do/buy whether or not I planned on posting about it. There are some bloggers/youtubers that will buy lots of things, do posts on them, then return the items. Others also stretch their budgets way too thin to buy products. I think it is much more economic to do posts about things you actually want, rather than what you guess other people might want to see a post about. I think that if your posts reflect who you are as a person, you will be more successful than if you are trying to be a certain mold. Most importantly, you can blog about things that don't cost you money but that you think someone will find interesting! Be creative and think of things like DIY's, informational posts, tips, and tricks.or a post about how to afford beauty blogging...
2. Budgeting:
This is really important in all facets of your life. Look at the total amount of income you have. This can be anything from a paycheck from your day-job to allowance from your parents. Then come up with a list of priorities for your spending. When I know I'm going to want to get some beauty products that are a bit more of a treat (like my recent Make-Up Geek Shadow Haul) I make sure to save some money for that item. All kinds of small things like bringing lunch to work/school, or skipping that extra latte in the afternoon can free up cash that you can put towards your blogging hobby. Side note, please don't go into debt for your hobby. It will stop being fun, and just be stressful. It's not worth it for something that should bring you joy.
3. Promoting Your Blog Smart:
Before you spend hundreds on a custom page, custom domain name, fancy equipment or advertising, I'd say take a look at your content. If you were someone else, do you have enough content that would inspire you to subscribe, like, or tweet about the blog? If not, it's not the time to advertise yet! As far as blog design goes, before you spend buko-bucks getting a page designed, try DIY-ing it. There are so many great resources out there for how to style your blog yourself. Also, services like blogger make it quite easy to learn by trial and error. I also think it is vital to connect your blog with as much online social media as possible. It is a lot to maintain, but by using social media and hashtags, your can get a lot of viewers for free!
You can also try applying for blogger networks. I'm super proud to be a member of Her Campus Blogger Network. May great opportunities have come from my membership in this group.
As far as paying for advertising, I think a great first step to advertising is to get business cards. They are relatively cheap (see how I got my business cards in this post). You can get a bunch and leave them with your hair stylist, your manicurist, random people you meet who might be interested. Especially make sure to give a bunch to friends and family. You know grandma likes to brag about your accomplishments right? Perfect! There is nothing like personal interactions to start getting viewers.
The last promotion thing I will suggest that might be worth the money is facebook advertising. Once you have exhausted all free/cheap promoting options, I suggest adding viewers through facebook. It has worked well for me!
4. Sponsored Posts:
There are many avenues by which bloggers/youtubers might come across the opportunity to try things for free. They are given the products and asked to review them. A disclaimer should be somewhere on that post, indicating that the review is sponsored. This is one way that bloggers/youtubers get things to generate content. I have only had this chance 2 times so far for Venus Embrace Sensitive Razors and Hujan Skin Care. That being said, this normally occurs when you have a pretty substantial viewership already.
5. Ad Revenue
It is easy when using a blogging site like blogger to put ads on the side of your page. When you are just starting out, I'd keep it to one ad or none at all. Without viewers, you have nobody to click your ads. I highly suggest building a fan base before trying to generate money from your blog. While it is great if eventually you can pay for your blogging hobby with your blog itself, I think it is most important that you enjoy blogging, nurture it, and let it grow. The less annoyingly covered in ads your blog is, the more likely you are to build your fan base.
I know, money is scary! Boooo! Spooooky right?! Anyway, here is my post for today, and as always,
Shine & Sparkle
I know lots of bloggers are doing scary make-up looks and costumes. However, I could think of nothing scarier than tackling the financial aspect of having a beauty blog. Sometimes I look at other beauty bloggers and youtubers and think "how do they afford to buy/review all that stuff?!" This inspired this post about some tips about how I balance things support my blogging hobby and perhaps offer some advice to bloggers who are just starting out. I also wanted to provide you with some perspective on the big name bloggers/youtubers out there. And most of all, I want to stress that if you are passionate and dedicate time and love into what you are doing, it will be far more successful than if you simply pour tons of money into it.
![]() |
| Like all my images, (such as Squiggle's hat) I'll gladly give someone credit for their image or take it down if someone throws a hissy fit. |
As a quick disclaimer: I am NOT a financial professional. I am also NOT the world's most successful blogger (though I hope to be some day!) I am just telling you what works for me and my opinion. Take my advice with a grain of salt.
1. Post Smart:
Views are money. The more views, the more likely someone will click on one of your ads (which generate revenue). I like to think that if it is something I'm interested in, someone else might be too. This means that other people might be searching the internet for it. If your post closely matches what someone is looking for, search engines are more likely to display it. Search optimization is important! Also, most of my posts about something I was going to do/buy whether or not I planned on posting about it. There are some bloggers/youtubers that will buy lots of things, do posts on them, then return the items. Others also stretch their budgets way too thin to buy products. I think it is much more economic to do posts about things you actually want, rather than what you guess other people might want to see a post about. I think that if your posts reflect who you are as a person, you will be more successful than if you are trying to be a certain mold. Most importantly, you can blog about things that don't cost you money but that you think someone will find interesting! Be creative and think of things like DIY's, informational posts, tips, and tricks.
2. Budgeting:
This is really important in all facets of your life. Look at the total amount of income you have. This can be anything from a paycheck from your day-job to allowance from your parents. Then come up with a list of priorities for your spending. When I know I'm going to want to get some beauty products that are a bit more of a treat (like my recent Make-Up Geek Shadow Haul) I make sure to save some money for that item. All kinds of small things like bringing lunch to work/school, or skipping that extra latte in the afternoon can free up cash that you can put towards your blogging hobby. Side note, please don't go into debt for your hobby. It will stop being fun, and just be stressful. It's not worth it for something that should bring you joy.
3. Promoting Your Blog Smart:
Before you spend hundreds on a custom page, custom domain name, fancy equipment or advertising, I'd say take a look at your content. If you were someone else, do you have enough content that would inspire you to subscribe, like, or tweet about the blog? If not, it's not the time to advertise yet! As far as blog design goes, before you spend buko-bucks getting a page designed, try DIY-ing it. There are so many great resources out there for how to style your blog yourself. Also, services like blogger make it quite easy to learn by trial and error. I also think it is vital to connect your blog with as much online social media as possible. It is a lot to maintain, but by using social media and hashtags, your can get a lot of viewers for free!
You can also try applying for blogger networks. I'm super proud to be a member of Her Campus Blogger Network. May great opportunities have come from my membership in this group.
As far as paying for advertising, I think a great first step to advertising is to get business cards. They are relatively cheap (see how I got my business cards in this post). You can get a bunch and leave them with your hair stylist, your manicurist, random people you meet who might be interested. Especially make sure to give a bunch to friends and family. You know grandma likes to brag about your accomplishments right? Perfect! There is nothing like personal interactions to start getting viewers.
The last promotion thing I will suggest that might be worth the money is facebook advertising. Once you have exhausted all free/cheap promoting options, I suggest adding viewers through facebook. It has worked well for me!
4. Sponsored Posts:
There are many avenues by which bloggers/youtubers might come across the opportunity to try things for free. They are given the products and asked to review them. A disclaimer should be somewhere on that post, indicating that the review is sponsored. This is one way that bloggers/youtubers get things to generate content. I have only had this chance 2 times so far for Venus Embrace Sensitive Razors and Hujan Skin Care. That being said, this normally occurs when you have a pretty substantial viewership already.
5. Ad Revenue
It is easy when using a blogging site like blogger to put ads on the side of your page. When you are just starting out, I'd keep it to one ad or none at all. Without viewers, you have nobody to click your ads. I highly suggest building a fan base before trying to generate money from your blog. While it is great if eventually you can pay for your blogging hobby with your blog itself, I think it is most important that you enjoy blogging, nurture it, and let it grow. The less annoyingly covered in ads your blog is, the more likely you are to build your fan base.
I know, money is scary! Boooo! Spooooky right?! Anyway, here is my post for today, and as always,
Shine & Sparkle
Wednesday, October 15, 2014
How To Properly Remove, Clean, And Care For Your Fake Lashes
Hi Shine and Sparkle Report Readers!
Today I have a quick tip on cleaning your fake lashes so you can re-use them. Lashes can be quite pricey, up to $15-$30 a pair. It's no fun to throw away something you spent money on before you have to right?! I'll quickly start by telling you that my favorite lash brand is Ardell Lashes*. They are super comfortable and I love that most of them are made of 100% sterilized human hair. I also like how affordable they are (around $3-$4USD). I learned my lesson and do not suggest the 10 pairs for less than $5 sold online from unknown sources in China. These are epic in their lack of comfortableness.
Second, I want to tell you that my favorite lash glue is Kiss Ever EZ Lashes Strip Lash Adhesive* because I love the application wand and the easy removal of the glue from your face and the lash band. I find the oh-so-popular Duo lash glue too strong. It cements lashes to my face and inevitably pulls out real lashes during removal. Eek.
Removing Lashes:
DO NOT PULL OFF THE LASH! It will be like ripping off a band-aid...on your eye. Eek again.
To properly remove lashes, saturate a cotton pad with good quality eye-makeup remover. Place it over a closed eye (you don't want to get make-up remover in your eye, trust me...oh the stinging...) with false lash on it. Let the pad sit on your eye for at least 30 seconds, then wipe the pad down towards your mouth. If the eye-make up remover has broken down the glue sufficiently, the lash should simply slide off and be attached to the cotton pad. If the lash is still on your eye, let the cotton pad sit on the eye longer, maybe add more eye-makeup remover. Repeat this process for your other eye.
Cleaning Lashes:
Step 1: Remove and Make-up/Extra Lash Glue
I place the lashes on a tissue and then pour over some eye-makeup remover onto them. I gently use the wet tissue (a good make-up wipe could work for this as well) to remove as much excess glue and make-up on the lash as possible. Wiping from the base of the lash to the tips. This prevents ruining the shape of the last as much as possible.
Step 2 (optional): Re-shape the lashes with a flat iron or curling iron.
If your lashes seem to still be a bit out of shape, you can try to quickly reshape HUMAN HAIR ONLY lashes (unless you love the smell and mess of burnt plastic) by quickly running the lash part (NOT THE BAND) through a flat iron or place the lashes on a thick dish towel and press a curling iron over the lash part in very quick movements to try and reshape them. It might help to hold the lash with a tweezer. If your hot tool has heat settings, the lowest setting should be sufficient. BE CAREFUL not to burn yourself! I am not responsible if you are not careful and burn yourself or your house down. Do this step at your own risk.
Step 3: Sterilize the Lashes
Nobody wants an eye infection, so place the cleaned lashes on a new tissue, and pour over some regular drug-store rubbing alcohol until the lash is saturated. Let the lashes sit in the alcohol for about 30 seconds to 1 minute. You can squeeze the excess alcohol through the lashes by folding the wet tissue over the lashes and pressing gently to ensure it is sterilized as possible.
Step 4: Sterilize the lash case.
If you put the sterilized lases back in the case without wiping the case down with alcohol as well, you might as well have not bothered sterilizing the lashes in the first place. Make sure to rub down all surfaces of your lash case before returning your sterilized lashes.
How Many Times Can You Re-Use Lashes?
Ardell suggests that your use your lashes no longer than 3 weeks. That being said, I'm not sure if they mean 3 weeks of everyday use or not. Since I do not wear fake lashes every day and I'm good about cleaning them, I tend to just use judgement. I tend to throw away my lashes as soon as any of the following things happen:
I hope you have enjoyed this quick tip and as always,
Shine & Sparkle!
*I am not paid or contacted by any of the companies mentioned in this post. These are my honest feelings and opinions.
Today I have a quick tip on cleaning your fake lashes so you can re-use them. Lashes can be quite pricey, up to $15-$30 a pair. It's no fun to throw away something you spent money on before you have to right?! I'll quickly start by telling you that my favorite lash brand is Ardell Lashes*. They are super comfortable and I love that most of them are made of 100% sterilized human hair. I also like how affordable they are (around $3-$4USD). I learned my lesson and do not suggest the 10 pairs for less than $5 sold online from unknown sources in China. These are epic in their lack of comfortableness.
Second, I want to tell you that my favorite lash glue is Kiss Ever EZ Lashes Strip Lash Adhesive* because I love the application wand and the easy removal of the glue from your face and the lash band. I find the oh-so-popular Duo lash glue too strong. It cements lashes to my face and inevitably pulls out real lashes during removal. Eek.
![]() |
| Like all my images, I'll gladly give someone credit for their image or take it down if someone throws a hissy fit |
Removing Lashes:
DO NOT PULL OFF THE LASH! It will be like ripping off a band-aid...on your eye. Eek again.
To properly remove lashes, saturate a cotton pad with good quality eye-makeup remover. Place it over a closed eye (you don't want to get make-up remover in your eye, trust me...oh the stinging...) with false lash on it. Let the pad sit on your eye for at least 30 seconds, then wipe the pad down towards your mouth. If the eye-make up remover has broken down the glue sufficiently, the lash should simply slide off and be attached to the cotton pad. If the lash is still on your eye, let the cotton pad sit on the eye longer, maybe add more eye-makeup remover. Repeat this process for your other eye.
Cleaning Lashes:
Step 1: Remove and Make-up/Extra Lash Glue
I place the lashes on a tissue and then pour over some eye-makeup remover onto them. I gently use the wet tissue (a good make-up wipe could work for this as well) to remove as much excess glue and make-up on the lash as possible. Wiping from the base of the lash to the tips. This prevents ruining the shape of the last as much as possible.
Step 2 (optional): Re-shape the lashes with a flat iron or curling iron.
If your lashes seem to still be a bit out of shape, you can try to quickly reshape HUMAN HAIR ONLY lashes (unless you love the smell and mess of burnt plastic) by quickly running the lash part (NOT THE BAND) through a flat iron or place the lashes on a thick dish towel and press a curling iron over the lash part in very quick movements to try and reshape them. It might help to hold the lash with a tweezer. If your hot tool has heat settings, the lowest setting should be sufficient. BE CAREFUL not to burn yourself! I am not responsible if you are not careful and burn yourself or your house down. Do this step at your own risk.
Step 3: Sterilize the Lashes
Nobody wants an eye infection, so place the cleaned lashes on a new tissue, and pour over some regular drug-store rubbing alcohol until the lash is saturated. Let the lashes sit in the alcohol for about 30 seconds to 1 minute. You can squeeze the excess alcohol through the lashes by folding the wet tissue over the lashes and pressing gently to ensure it is sterilized as possible.
Step 4: Sterilize the lash case.
If you put the sterilized lases back in the case without wiping the case down with alcohol as well, you might as well have not bothered sterilizing the lashes in the first place. Make sure to rub down all surfaces of your lash case before returning your sterilized lashes.
How Many Times Can You Re-Use Lashes?
Ardell suggests that your use your lashes no longer than 3 weeks. That being said, I'm not sure if they mean 3 weeks of everyday use or not. Since I do not wear fake lashes every day and I'm good about cleaning them, I tend to just use judgement. I tend to throw away my lashes as soon as any of the following things happen:
- If the lash is falling apart or looking ratty no matter what I do to it.
- Make-up and glue are caked on there and won't come off easily.
- If the lash has any sort of smell.
I hope you have enjoyed this quick tip and as always,
Shine & Sparkle!
*I am not paid or contacted by any of the companies mentioned in this post. These are my honest feelings and opinions.
Tuesday, September 30, 2014
Influenster Venus Vox Box Review of Gillette Venus Embrace Sensitive!
Hi Shine and Sparkle Readers!
Thank you for tuning in once again to your weekly S+SR post! This time we have a very special (and sponsored) post. See, I told you all in my Introduction Post that I would always be completely honest with you all. I'm excited because I was skeptical at the beginning of my blogging adventure that I would ever be in a position to have to tell you that a post was sponsored. Admittedly, I had one other sponsored post from Hujan Luxury Skin Care, but that post was from a small local business which I interacted with personally. In this case, a large company has looked at the lil' old awe-inspiring Shine and Shine and Sparkle Report and determined that we would be a good fit to review their products! I was seriously stoked to see this message in my email inbox:
In case you didn't know, My Profile on Influenster is where I do quick and dirty product reviews of lots of products from all assets of life. These reviews are nowhere near as in depth as a Shine and Sparkle Report post, but it does help with the visibility and reviewing power associated with this blog. If you are "influential" enough (get it?), then you can qualify for different sponsored boxes of things to try out! I'm so excited that S+SR has influenced them to consider us worthy of a box!
Without any more gushing, I'm so excited to be able to give you my opinion on Gillette's Venus Embrace "Sensitive" Razor* coming to a store near you soon!
As you might have seen in my excited barrage of facebooking, tweeting, and instagraming, the product looks like this:
Overall, I give it an B+! In a nutshell, I loved it for large of flat areas (legs, arms, under arms, backs, chests, heads, etc) but I do not particularly like it for harder to reach areas or detailed work.
Packaging/Design: It opens easily by popping open the back of the package (no cutting yourself trying to pry anything open--which is good because shaving has it's own cutting risk without crazy packaging). It comes with two razor blades which are very simple to attach. Just peel black the cover and shove in your handle. Idiot proof! I also love how low profile the holder for the razor is. Compared to my other razor (by The-Brand-Who-Shall-Not-Be-Named"). The razor itself is much lighter than my old one (though my other one had a battery and a trimmer--which I used a grand total of 5 times). The razor also has good "swivel" so I don't think it is high risk when shaving legs. The biggest difference from my old razor is that the 5 blades make up a relatively small percentage of the overall razor head, meaning that the profile of the blade is quite large... I couldn't find a better way to say that. I swear! I was initially concerned that this would make it hard to get into hard to reach places.
Function: I started shaving my legs and I was amazed at how friction-less the shave was. It also seemed to cover quite a large area in one swoop. Shaving my legs sped by in a nano second. The result was phenomenal on my legs, with hardly a follicle showing. I moved on to my underarms, which needed only two strokes each to sweep off hair with a feather's touch. I was quite impressed. Then it was on to the true test, the bikini area. Let's face it, the bikini area is the hardest with coarser hair, funny angles to reach, an by far the most sensitivity. The main lawn was attended to with the grace it exhibited on my legs and under-arms. But, lets just say my fears that the largeness of thehead razor blade was not conducive to precision work. My Brand-Who-Shall-Not-Be-Named razor is much better at being precise, it did have an advertisement with women prancing by perfectly manicured topiary for heavens sake. So overall, I'm very impressed. My legs had an amazing shave, were not irritated, and were somewhat moisturized (I still needed to use lotion afterwards). Underarms were a breeze. But I think I'll leave my bikini area to my old razor.
It wouldn't be a Shine and Sparkle Report post without me actually giving you some tips about what I'm reviewing. So here are some awesome (and related) quick tips!
As Always,
Shine & Sparkle
* Hopefully it is obvious by the whole introduction to this post, but this is actually a sponsored post (so excited)! I received these products to review complementary from the company that produced them. However, I have not received any additional monetary compensation other than the opportunity to try them and give you my honest thoughts.
Thank you for tuning in once again to your weekly S+SR post! This time we have a very special (and sponsored) post. See, I told you all in my Introduction Post that I would always be completely honest with you all. I'm excited because I was skeptical at the beginning of my blogging adventure that I would ever be in a position to have to tell you that a post was sponsored. Admittedly, I had one other sponsored post from Hujan Luxury Skin Care, but that post was from a small local business which I interacted with personally. In this case, a large company has looked at the
In case you didn't know, My Profile on Influenster is where I do quick and dirty product reviews of lots of products from all assets of life. These reviews are nowhere near as in depth as a Shine and Sparkle Report post, but it does help with the visibility and reviewing power associated with this blog. If you are "influential" enough (get it?), then you can qualify for different sponsored boxes of things to try out! I'm so excited that S+SR has influenced them to consider us worthy of a box!
Without any more gushing, I'm so excited to be able to give you my opinion on Gillette's Venus Embrace "Sensitive" Razor* coming to a store near you soon!
As you might have seen in my excited barrage of facebooking, tweeting, and instagraming, the product looks like this:
Overall, I give it an B+! In a nutshell, I loved it for large of flat areas (legs, arms, under arms, backs, chests, heads, etc) but I do not particularly like it for harder to reach areas or detailed work.
Packaging/Design: It opens easily by popping open the back of the package (no cutting yourself trying to pry anything open--which is good because shaving has it's own cutting risk without crazy packaging). It comes with two razor blades which are very simple to attach. Just peel black the cover and shove in your handle. Idiot proof! I also love how low profile the holder for the razor is. Compared to my other razor (by The-Brand-Who-Shall-Not-Be-Named"). The razor itself is much lighter than my old one (though my other one had a battery and a trimmer--which I used a grand total of 5 times). The razor also has good "swivel" so I don't think it is high risk when shaving legs. The biggest difference from my old razor is that the 5 blades make up a relatively small percentage of the overall razor head, meaning that the profile of the blade is quite large... I couldn't find a better way to say that. I swear! I was initially concerned that this would make it hard to get into hard to reach places.
Function: I started shaving my legs and I was amazed at how friction-less the shave was. It also seemed to cover quite a large area in one swoop. Shaving my legs sped by in a nano second. The result was phenomenal on my legs, with hardly a follicle showing. I moved on to my underarms, which needed only two strokes each to sweep off hair with a feather's touch. I was quite impressed. Then it was on to the true test, the bikini area. Let's face it, the bikini area is the hardest with coarser hair, funny angles to reach, an by far the most sensitivity. The main lawn was attended to with the grace it exhibited on my legs and under-arms. But, lets just say my fears that the largeness of the
It wouldn't be a Shine and Sparkle Report post without me actually giving you some tips about what I'm reviewing. So here are some awesome (and related) quick tips!
- Exfoliate your skin before shaving! This will help draw out in-grown hairs and get rid of dead skin that might prevent you from getting the closest shave possible.
- If you have super sensitive skin when shaving, try shaving in the direction of the hair. The shave might not be as close, but it will not be as irritating.
- Try using hair conditioner or hair mask as a shaving lotion instead of shaving cream in a pinch (it leaves your legs so soft!)
As Always,
Shine & Sparkle
* Hopefully it is obvious by the whole introduction to this post, but this is actually a sponsored post (so excited)! I received these products to review complementary from the company that produced them. However, I have not received any additional monetary compensation other than the opportunity to try them and give you my honest thoughts.
Wednesday, September 17, 2014
Top 10 Beautifying Essentials For Your Trip To Maui, Hawaii!
Aloha My Lovely Shine and Sparklers,
Those who follow my Twitter, Instagram, and Facebook know (look in the side bar if you are interested in looking or even *gasp* following me), I have recently taken a vacation to Maui, Hawaii! I wanted to give you a quick glace at my vacation if you didn't get to see it on social media. I also wanted to give you my top 10 Beautifying Essentials I realized I wish someone had stressed to me before I went! Unfortunately I didn't get to fly first class (like I did in this United Airlines First Class Review post). But I still loveeeeeed my trip.
First, here are a few awesome pictures from my Maui Trip:
Top 10 Beautifying Essentials to bring to Maui, Hawaii:
Reminder: Make sure any large liquids or aerosol containers are in your checked luggage! Don't want to have TSA take your beauty essentials away from you! Also, a lot of these tips work no matter what your gender is, so I'm adding to my list of "For Him" posts.
Those who follow my Twitter, Instagram, and Facebook know (look in the side bar if you are interested in looking or even *gasp* following me), I have recently taken a vacation to Maui, Hawaii! I wanted to give you a quick glace at my vacation if you didn't get to see it on social media. I also wanted to give you my top 10 Beautifying Essentials I realized I wish someone had stressed to me before I went! Unfortunately I didn't get to fly first class (like I did in this United Airlines First Class Review post). But I still loveeeeeed my trip.
First, here are a few awesome pictures from my Maui Trip:
Top 10 Beautifying Essentials to bring to Maui, Hawaii:
Reminder: Make sure any large liquids or aerosol containers are in your checked luggage! Don't want to have TSA take your beauty essentials away from you! Also, a lot of these tips work no matter what your gender is, so I'm adding to my list of "For Him" posts.
- Water Proof Sunscreen. By far my #1! Buy it on sale at home and bring it with you. Hawaii knows that if you will pay more for sunscreen there so they make the prices higher than I know I want to pay. Bring your own is economical and necessary to prevent skin damage from the sun. Vacation is no fun with sun burns. I suggest going higher in SPF than you normally go, since there is so much sun in Hawaii.
- Lip Balm with SPF. Your lips burn can burn just like the rest of your skin. And honestly, you want to be relaxing and playing in the water. Not worrying if your lipstick is smudging. If you really need some color, get a tinted lip balm with SPF of apply a lip stain before your normal SPF lip balm. It's Maui, no need to dark vampy lipsticks here.
- Very Waterproof eyeliner. Mascara and eyeshadows probably aren't going to stand up to all day on the beach and in the pool. But I have been quite successful with the eye liners I detail in my Best Long Wearing Eyeliner for Monolids/Hooded Eyes post. These barely budged after all day lounging in the chlorinated pool. Waterslide and all! And nothing helps me feel more confidant in my bikini than a little eye liner.
- Swimsuit(s). I want to mention this because I believe no matter who you are, what size, color, gender, or alien race you are--you should be free to enjoy the water on vacation! No sitting on the sidelines in your normal clothes because you don't want people to see you. You are amazing and beautiful just the way you are! Nobody is perfect and like every other non-perfect person at the beach/pool, you should enjoy your beach vacation. Swim away in whatever swimwear you desire little Shine and Sparklers. It's your vacation, you'll do what you want! I do suggest bringing more than one, since it takes longer for them to dry in the humidity. Nothing grosser than putting on a damp swim suit in the morning...
- Sun glasses. Again with the sun protection, I know. But really, you want to be able to read your book or look at things without hissing like a vampire caught in the sun. It's really sunny folks. I'm not kidding.
- Hair Ties. If you have long hair, you will really want these to keep your hair from becoming knotted and tangled in the pool. For medium-long hair, pony tails and if you can do braids/buns work great. If you have really long hair like me, buns and braids are a must!
- Deep Conditioning Hair Masque: All that time in the sun and water can really stress out your hair. I highly suggest bringing along your favorite deep conditioning hair masque. It will make life much nicer for your hair.
- One "Going Out" Outfit: Ok, so not something tight and clubbing-style like you would in Vegas, but maybe a casual pair of heels and a nice flowing dress or skirt top combination. Just in case you decide to go to a nice Luau or upscale dinner. Nothing in Maui is super over the top, but it's nice to have an option that isn't a bikini and shorts if you know what I mean.
- Nail Polish Refresh Kit: If you are addicted to having your nails colored (like yours truly) bringing the tools to refresh your nails is a must. All the water will chip your nails faster than a knife fight in a phone booth. I suggest keeping it really simple with just a nail file, nail polish remover pads (like these pads from E.L.F*), and the polish. I normally preach about the benefits of base coat and top coat (like in my "How to Get Salon Perfect Nails at Home" post), but for a refresh in the middle of your vacation, you don't want to be spending all that time. Also, the humidity means nail polish dries much slower.
- Intention to Unplug: My last essential is NOT bringing your media everywhere! Unplug for the day, everything can wait until you get back to your hotel room at least! The day of surfing, swimming, and lounging don't need to be bothered by a constant barrage of media from life back home. Really take this time to escape, relax, and center yourself. If you are on the vacation with others, enjoy your time with them in the moment. Don't worry about if the rest of the world knows you are enjoying the moment. Why do you think I missed a blog post *GASP*. If you HAVE to bring your phone with you to take pictures, I really suggest putting it in airplane mode, to encourage you to avoid the addition to social media and really concentrate on the lovely vacation you are having.
I hope this "Top 10" list helped you out! I thought it was kind of fun. Generally speaking I get a bit annoyed with blogs that are always making "Top -insert arbitrary number here-" lists as a way to get people to click on things. But I thought it might be a fun format for this post.
Let me know in the comments or other social media if you also get annoyed with the whole "Top 24 Thing-a-ma-bobs For Picking A Wombat-Puppy Hybrid Pet or Your Nose" internet article trend. And as always,
Shine & Sparkle!
*I am not paid or contacted by any of the companies mentioned in this post. These are my honest feelings and opinions.
Wednesday, September 10, 2014
DIY To Make Your Lotion More Moisturizing!
Hi Shine and Sparkle Readers,
Thank you so much for tuning into this week's quick tip! Do you have a lotion for your body or face that you wish would hydrate your skin more? Did you buy a lotion that just doesn't seem to do much? Here is my life changing tip to get the most benefit out of your lotions/moisturizers:
Add A Few Drops Of Your Favorite Pure Oil!
Depending on the dryness and how large an area you want to moisturize, experiment with adding a few drops of oil to your lotions. This also works with hair serums! The most important thing is to make sure the oil has preferably only one ingredient--oil. Organic and fragrance free are best. However, if you can't find certain oils fragrance free or organic, this will still work.
Also, start with only 1-2 drops of oil and see how you like the results. You may want to add more or less depending on you skin type and condition.
Quick Warning: If you plan to use make-up over your moisturizer, you might want to skip this tip because oils break down make-up. This could lead to your make-up easily smudging or reacting strangely.
Suggested Oils:
As Always,
Shine & Sparkle!
Thank you so much for tuning into this week's quick tip! Do you have a lotion for your body or face that you wish would hydrate your skin more? Did you buy a lotion that just doesn't seem to do much? Here is my life changing tip to get the most benefit out of your lotions/moisturizers:
Add A Few Drops Of Your Favorite Pure Oil!
Depending on the dryness and how large an area you want to moisturize, experiment with adding a few drops of oil to your lotions. This also works with hair serums! The most important thing is to make sure the oil has preferably only one ingredient--oil. Organic and fragrance free are best. However, if you can't find certain oils fragrance free or organic, this will still work.
Also, start with only 1-2 drops of oil and see how you like the results. You may want to add more or less depending on you skin type and condition.
Quick Warning: If you plan to use make-up over your moisturizer, you might want to skip this tip because oils break down make-up. This could lead to your make-up easily smudging or reacting strangely.
Suggested Oils:
- Argan Oil (My favorite!)
- Coconut Oil (My second favorite!)
- Olive Oil
- Almond Oil
- Avocado Oil
- Vitamin E Oil (This is often vitamin E suspended in soybean oil, so it's not my first choice, but it does work).
As Always,
Shine & Sparkle!
Wednesday, July 23, 2014
Emergency/DIY Deodorant
Hi Shine and Sparkle Report Readers!
I just wanted to give you a quick tip in case you find yourself without deodorant for some reason. Let's face it, sometimes you need to stop smelling but don't have any real deodorant with you. So what are your emergency options?
1) Anti-bacterial hand Sanitizer. In a pinch, put some of this under your arms. The alcohol will help kill the bacteria that cause underarm odor. It's not a very long lasting solution, but in a pinch, it will serve you well. If you don't carry hand sanitizer, lots of places have free hand sanitizer these days (grocery stores, drug stores, pet stores etc...) so hunt around and you might just find some near by.
2) Lemon. Starting to smell at the restaurant? Grab a lemon slice from the bar or your ice-tea and sneak it into the bathroom. Rub the lemon under your arms. The juice will naturally cleanse and deodorize. Plus, you will smell lemony fresh! I have never tried this with limes, but I assume it would work as well.
3) Alcohol. So you might not have any lemons, you might not have any hand sanitizer. Maybe you have vodka? Or rubbing alcohol. Either of these items should work to combat smelly arm pits.
4) Facial Toner. Last but not least, if you use a toner in your skin care routine, it could also be used in a pinch as deodorant. You also may be surprised to see how much your general smelly-ness level can decrease if you periodically use facial toner on your under arms after you get out of the shower.
Why do these emergency deodorant solutions work? Did you know sweat is generally odorless? However, body odor results from bacteria that gather in specific types of sweat called "fatty" sweat that is found in areas such as your underarms. When naturally occurring bacteria from your body starts breaking down the sweat, it produces body odor. Anti-antiperspirants in deodorant stop you from sweating so that there is nothing for the bacteria to break down and produce smell. My emergency options pretty much combat any surface bacteria that is present at the time of application and dry up/remove existing sweat. Because my options don't stop you from sweating all together, they are more emergency solutions rather than long lasting solutions.
As Always,
Shine & Sparkle!
I just wanted to give you a quick tip in case you find yourself without deodorant for some reason. Let's face it, sometimes you need to stop smelling but don't have any real deodorant with you. So what are your emergency options?
1) Anti-bacterial hand Sanitizer. In a pinch, put some of this under your arms. The alcohol will help kill the bacteria that cause underarm odor. It's not a very long lasting solution, but in a pinch, it will serve you well. If you don't carry hand sanitizer, lots of places have free hand sanitizer these days (grocery stores, drug stores, pet stores etc...) so hunt around and you might just find some near by.
2) Lemon. Starting to smell at the restaurant? Grab a lemon slice from the bar or your ice-tea and sneak it into the bathroom. Rub the lemon under your arms. The juice will naturally cleanse and deodorize. Plus, you will smell lemony fresh! I have never tried this with limes, but I assume it would work as well.
3) Alcohol. So you might not have any lemons, you might not have any hand sanitizer. Maybe you have vodka? Or rubbing alcohol. Either of these items should work to combat smelly arm pits.
4) Facial Toner. Last but not least, if you use a toner in your skin care routine, it could also be used in a pinch as deodorant. You also may be surprised to see how much your general smelly-ness level can decrease if you periodically use facial toner on your under arms after you get out of the shower.
Why do these emergency deodorant solutions work? Did you know sweat is generally odorless? However, body odor results from bacteria that gather in specific types of sweat called "fatty" sweat that is found in areas such as your underarms. When naturally occurring bacteria from your body starts breaking down the sweat, it produces body odor. Anti-antiperspirants in deodorant stop you from sweating so that there is nothing for the bacteria to break down and produce smell. My emergency options pretty much combat any surface bacteria that is present at the time of application and dry up/remove existing sweat. Because my options don't stop you from sweating all together, they are more emergency solutions rather than long lasting solutions.
As Always,
Shine & Sparkle!
Wednesday, May 28, 2014
Top 3 Skin Care Tips You Are Not Doing!
Hi Shine and Sparkle Report Readers!
Today I wanted to do a quick tip that lists the top 3 skin care tips you might not be doing. Doing these 3 things will dramatically increase the effectiveness of the products you use. In the interested of making this an actual quick tip, not a mile long post, lets get straight into it.
#1: Always Apply Products to Clean Skin/Exfoliate Occasionally: If there is a lot of dirt, skin build up, or bacteria on your skin, it will be harder for your products to work. If nothing else make sure your skin is clean. Washing your face 2 times a day with a gentle cleanser is my recommendation. Every so often use an exfoliating face wash (Without microbeads please! Read about that here!) to get off dead skin cells. Who cares if you apply product to dead skin cells, we want to nourish the healthy ones! Why not exfoliate every day? Why not with harsh face brushes? Because irritation to your skin is never good. It contributes to acne and the increased pulling/over exfoliation can lead to making your skin very sensitive and more prone to winkles/sun damage. Boo to that.
#2 Let Each Product Absorb Before Adding the Next One: It might make your skin care routine take a bit longer, but if you wait for each layer of your routine to fully absorb and dry in between layers, they will work MUCH better. This applies even if you just apply moisturizer after you wash your face. If you wait for a clean dry surface of your skin, it will make those products work better because they are not mixing together as much or competing. You also will prevent any products from balling/caking up and looking weird on your face.
#3 Wash Your Face Last In The Shower: I know you might think this wouldn't matter, but it does. Washing your face last means you get off any shampoo, conditioner, bodywash/soap residue that might be on your face. These residues are not great for your face and could effect how well your face products work. Conditioner especially can contribute to break outs, so this step is very important for acne sufferers. Doing this, ensures that you have the clean skin noted in #1 to start your skin care routine.
Hope you like my quick tips and hope to get an updated skin care routine post up and a Vegas post (if you follow me on facebook, twitter or instagram, you'd know about that already) asap.
Shine & Sparkle!
Today I wanted to do a quick tip that lists the top 3 skin care tips you might not be doing. Doing these 3 things will dramatically increase the effectiveness of the products you use. In the interested of making this an actual quick tip, not a mile long post, lets get straight into it.
#1: Always Apply Products to Clean Skin/Exfoliate Occasionally: If there is a lot of dirt, skin build up, or bacteria on your skin, it will be harder for your products to work. If nothing else make sure your skin is clean. Washing your face 2 times a day with a gentle cleanser is my recommendation. Every so often use an exfoliating face wash (Without microbeads please! Read about that here!) to get off dead skin cells. Who cares if you apply product to dead skin cells, we want to nourish the healthy ones! Why not exfoliate every day? Why not with harsh face brushes? Because irritation to your skin is never good. It contributes to acne and the increased pulling/over exfoliation can lead to making your skin very sensitive and more prone to winkles/sun damage. Boo to that.
#2 Let Each Product Absorb Before Adding the Next One: It might make your skin care routine take a bit longer, but if you wait for each layer of your routine to fully absorb and dry in between layers, they will work MUCH better. This applies even if you just apply moisturizer after you wash your face. If you wait for a clean dry surface of your skin, it will make those products work better because they are not mixing together as much or competing. You also will prevent any products from balling/caking up and looking weird on your face.
#3 Wash Your Face Last In The Shower: I know you might think this wouldn't matter, but it does. Washing your face last means you get off any shampoo, conditioner, bodywash/soap residue that might be on your face. These residues are not great for your face and could effect how well your face products work. Conditioner especially can contribute to break outs, so this step is very important for acne sufferers. Doing this, ensures that you have the clean skin noted in #1 to start your skin care routine.
Hope you like my quick tips and hope to get an updated skin care routine post up and a Vegas post (if you follow me on facebook, twitter or instagram, you'd know about that already) asap.
Shine & Sparkle!
Wednesday, April 16, 2014
How To Get Heatless Beachy Waves Quick Tip
Happy Sparkle-Wednesday Shine and Sparkle Report Readers!
Spring/Summer is here (at least in the Bay Area)! This means a lot of girls striving for soft beachy waves. It's that gorgeous "effortless" wave look that seems (to those without naturally wavy hair) to be anything but effortless. I know my hair doesn't look like "beachy waves" after a day at the beach! Without committing to a new surfing hobby, consider getting these waves without constant heat damaging. Plus, it seems silly to bust out a curling iron in order for your hair to have messy/tousled waves. Since my hair loves to be straight, the way I get hold and piecey beach waves without heat is as follows:
How To Get Heatless Beach Waves: Start by taking your shower in the evening. When your hair is barely damp/almost dry, put it up in 2 ballet buns (see someone else explain that because I'm lazy here) on the top of your head. Go to sleep. In the morning you will have great waves. To get the beachy texture, spray a bit of sea salt spray, then work the waves around your fingers. If you are like me and have very stubbornly straight hair, you might want to add an extra spritz of hair spray after the sea salt spray has made your hair perfectly separated and the hair spray will help it hold. Don't worry if the waves seem pretty extreme at first, they will relax throughout the day.
The sea salt spray I'm currently using is the Healthy Sexy Hair: Soy Renewal Beach Spray* which retails for about $20. My current Hair Spray love is the Sebastian: Shaper Plus retailing about $17. Both leave your hair soft. You can still run your fingers through it without getting ugly powdery white flakes, but still have pretty good hold.
Hope this quick tip lets you rock beach waves all spring and summer long.
Shine & Sparkle!
*I am not paid or contacted by any of the companies mentioned in this post. These are my honest feelings and opinions.
Spring/Summer is here (at least in the Bay Area)! This means a lot of girls striving for soft beachy waves. It's that gorgeous "effortless" wave look that seems (to those without naturally wavy hair) to be anything but effortless. I know my hair doesn't look like "beachy waves" after a day at the beach! Without committing to a new surfing hobby, consider getting these waves without constant heat damaging. Plus, it seems silly to bust out a curling iron in order for your hair to have messy/tousled waves. Since my hair loves to be straight, the way I get hold and piecey beach waves without heat is as follows:
How To Get Heatless Beach Waves: Start by taking your shower in the evening. When your hair is barely damp/almost dry, put it up in 2 ballet buns (see someone else explain that because I'm lazy here) on the top of your head. Go to sleep. In the morning you will have great waves. To get the beachy texture, spray a bit of sea salt spray, then work the waves around your fingers. If you are like me and have very stubbornly straight hair, you might want to add an extra spritz of hair spray after the sea salt spray has made your hair perfectly separated and the hair spray will help it hold. Don't worry if the waves seem pretty extreme at first, they will relax throughout the day.
The sea salt spray I'm currently using is the Healthy Sexy Hair: Soy Renewal Beach Spray* which retails for about $20. My current Hair Spray love is the Sebastian: Shaper Plus retailing about $17. Both leave your hair soft. You can still run your fingers through it without getting ugly powdery white flakes, but still have pretty good hold.
Hope this quick tip lets you rock beach waves all spring and summer long.
Shine & Sparkle!
*I am not paid or contacted by any of the companies mentioned in this post. These are my honest feelings and opinions.
Thursday, October 24, 2013
Beauty Tricks (and Treats!) Quick Tip
Spoooooookkyyy Hallllllooooooo (ween) Shine and Sparkles Readers!!!!!
Today I decided to post a special Halloween inspired quick tips! These Tricks and Treats are especially great for getting you in the fall mood, amping up your Halloween costume (and every day) looks.
Tricks:
1) Hair Dryer Lashes: If you hate wearing fake lashes (I admit they are not the most comfortable) Use your hair dryer to blast your eyelash curler for around 7-10 seconds (make sure its not too hot to burn your eyes!) and then use it to get the most dramatic curled lashes you have ever had! Maybe you wont even need those fake Halloween lashes! Use colored mascara if you want to make your lashes really crazy colored!
2) Eyeliner + Eye Shadow As Face Paint: This is also a great trick to use if you need to do an elaborate design on your face for Halloween! Cheap water proof eyeliner is much nicer for drawing on designs, stitches, and scars than those cheap face paints from the Halloween store! You can get all sorts of colors for just a dollar each at the drug store. Fill in your designs with eye shadows, If you use a good eye shadow base, they shouldn't go anywhere either. The colors will show up brighter if your base is white (white cream eye shadows works amazing too!)
3) Set Make Up With Hair Spray: While a setting spray if you have it is best, hair spray will do in a pinch! Mist your face from far away and that make-up will stay all night!
Treats:
1) Pumpkin Face Mask: Pumpkin is EVERYWHERE right now. Pumpkin things are definitely one of my favorite things for fall. You can make a quick DIY pumpkin face mask by combining 1/2 tbs organic pumpkin (canned is fine), 1 tbs honey, and a drizzle of your favorite oil (olive, coconut, jojoba, argan, take your pick!).
2) Mocha Body Scrub: Make a sweet inspired body scrub by combining around 1/2 cup coffee grounds (left over from your morning cuppa-joe is fine!), 2 tbs unsweetened cocoa powder, 1/4 cup of honey, and about 1/4 cup of your favorite oil. This smells amazing and is great to exfoliate your body with in the shower. Note: Be careful if your coffee is not ground finely as to not clog your bath drain! Use a hair catcher in the drain just in case!
3) Sugar Lip Scrub: Yummy Yummy Yummy! Mix raw sugar (the crystals are larger) with honey and a dash of lemon to make a paste. Use this to exfoliate your lips! It also tastes great! Halloween is about copious amounts of sugar anyway right?
I hope you liked my Halloween Tricks and Treats. Let me know if there is anything special you would like to know about for November Blog Posts!
Shine & Sparkle!
Today I decided to post a special Halloween inspired quick tips! These Tricks and Treats are especially great for getting you in the fall mood, amping up your Halloween costume (and every day) looks.
![]() |
| Squiggles wanted to be the giant from "Jack and the Beanstalk" for Halloween. Sure, why not? Little piggies can have big dreams too! ! |
Tricks:
1) Hair Dryer Lashes: If you hate wearing fake lashes (I admit they are not the most comfortable) Use your hair dryer to blast your eyelash curler for around 7-10 seconds (make sure its not too hot to burn your eyes!) and then use it to get the most dramatic curled lashes you have ever had! Maybe you wont even need those fake Halloween lashes! Use colored mascara if you want to make your lashes really crazy colored!
2) Eyeliner + Eye Shadow As Face Paint: This is also a great trick to use if you need to do an elaborate design on your face for Halloween! Cheap water proof eyeliner is much nicer for drawing on designs, stitches, and scars than those cheap face paints from the Halloween store! You can get all sorts of colors for just a dollar each at the drug store. Fill in your designs with eye shadows, If you use a good eye shadow base, they shouldn't go anywhere either. The colors will show up brighter if your base is white (white cream eye shadows works amazing too!)
3) Set Make Up With Hair Spray: While a setting spray if you have it is best, hair spray will do in a pinch! Mist your face from far away and that make-up will stay all night!
Treats:
1) Pumpkin Face Mask: Pumpkin is EVERYWHERE right now. Pumpkin things are definitely one of my favorite things for fall. You can make a quick DIY pumpkin face mask by combining 1/2 tbs organic pumpkin (canned is fine), 1 tbs honey, and a drizzle of your favorite oil (olive, coconut, jojoba, argan, take your pick!).
2) Mocha Body Scrub: Make a sweet inspired body scrub by combining around 1/2 cup coffee grounds (left over from your morning cuppa-joe is fine!), 2 tbs unsweetened cocoa powder, 1/4 cup of honey, and about 1/4 cup of your favorite oil. This smells amazing and is great to exfoliate your body with in the shower. Note: Be careful if your coffee is not ground finely as to not clog your bath drain! Use a hair catcher in the drain just in case!
3) Sugar Lip Scrub: Yummy Yummy Yummy! Mix raw sugar (the crystals are larger) with honey and a dash of lemon to make a paste. Use this to exfoliate your lips! It also tastes great! Halloween is about copious amounts of sugar anyway right?
I hope you liked my Halloween Tricks and Treats. Let me know if there is anything special you would like to know about for November Blog Posts!
Shine & Sparkle!
Monday, July 8, 2013
Beauty For Any Budget Quick Tip
Hey There Shine and Sparkle Report Readers!
Whether you are trying to stay on a budget, naturally frugal, or diving into your vault full of gold coins (I didn't know how Scrooge McDuck did it without cracking open his cartoon head, but we will pretend it is possible for the sake of my metaphor), everyone enjoys saving a bit of money. Maybe you are just jumping into the beauty world and are looking for a good place to start without investing too much money. In this post I give you some of my tips to get great deals on quality beauty products you can read from your 3rd mansion in Beverly Hills or your cardboard box camped outside of a Starbucks with free wi-fi (do Starbucks actually have free wi-fi anymore?)
Tips #1: Shop The Cheapest Drug Store Brands for Make-Up-
While most people know that the drug store is cheaper than Sephora or department stores, there are brands that are even more affordable than those that are readily recognizable to the average shopper. My favorites of these very low priced brands include: Wet n' Wild*, E.L.F, and NYX. I find that more often than not, these brands have better than average products on the most frequent basis. That being said, each of these brands really shines in specific areas. I have provided a guide to help you save money by increasing your chances that you do not waste your money based on my experiences:
Where Discount Brands Excel:
Wet n' Wild: Eye Shadow, Mascara, Nail Polish
E.L.F: Eye liner, Primers, Face Products (powder, blush, bronzer, highlighter etc), and brushes.
NYX: Lip Products (Gloss, Lipstick, Lip liner)
Physician's Formula**: Foundation
**While Physician's Formula isn't a super discounted brand, I feel that it is worth it to spend a bit extra on the base products that are going to soak into your skin the most. I have also never gotten a good foundation from any of the very cheap brands. Physician's formula has great quality products to choose from and is mid-range drug store pricing.
People also may see Jordana and NYC as equivalent brands in price. However, I find them to be very hit or miss. I think if you stick to the discount brand guidelines above, you stand the best chance of actually loving what you get.
Also shop with coupons or online to see/get the best deals. There are many blogs about couponing or finding the best deals online, so I will let you look that up somewhere else.
Tips #2: Prioritize Make-Up Spending-
This is surprisingly hard for some people. Much like wardrobe shopping, when you have limited resources, you want to get the essentials and then pieces that can be combined and reworked in different ways to achieve many different looks. This way it appears to the world that you have way more than you do. So using the low priced brands above, I have created a list of essential products you need. I have also included mini-tips to created multiple looks with less products (seriously, they are very mini, get your reading glasses).
List of Essential Make-Up Products:
1. Face primer (1)
Mini-Tip: Use your face primer as an eye primer. It works.
2. Foundation/Tinted Moisturizer (1) and Matching Powder (1)
Mini-Tip: You can mix a bit of your powder into your foundation and use as concealer if you are really trying to scale back on makeup.
3. Blush (2) and Bronzer (1)
Mini-Tip: You want one light blush for day time, and one darker blush for night. I suggest one be shimmer and one be matte. Which is shimmer depends on your preference. I suggest that your bronzer be matte to fit any occasion. Also, skip the highlighter when you are on a budget. That peachy/pearly eyeshadow color? Same thing.
4. Eyeshadow Pallets (2-3).
Mini-Tip: You need a mix of neutral shades and bright shades. You should have some matte and some shimmer shades to play with. You can definitely meet these criteria with just two pallets, but you can splurge on a third (especially if you are using a light color as a highlight!) Different eyeshadow looks is the easiest way to make you look dramatically different while your base products stay the same.
5. Eyeliner (1) and Lip Liner (1)
Mini-Tip: If you stick with a soft black eyeliner and a lipliner similar to your lip color, you will be set no matter what. You can just put some dark black eyeshadow over the liner to make it more bold and the softness will make it ok for day time. The lipliner will serve it's purpose as a base without changing the color of your lip products.
6. Mascara (2)
Mini-Tip: One water-proof, one not water proof. I would also suggest the water proof one to be more day time level of lash intensity (for being active during the day) and have the non-water proof one be more dramatic since it is unlikely you are going to need to be protected from water at night (unless you are more of an active person at night or cry a lot at night because you are a drama queen heehee).
7. Lipsticks (3) and Glosses (3)
Mini-Tip: You should aim for one nude, one "my lip color but better" (usually berry or pink), and one red of each. By mixing and matching these lipsticks and glosses, your possibilities are endless. You can wear the lipsticks and glosses in combination together, or each by themselves.
Tip #3: Shop Generic Beauty-
Shop generic for your moistuizers, cleaners, shampoos and conditioners. Sally's Beauty Supply has generics of even high end beauty products! How cool is that! Again, coupons, bargain/sales shelves, and buying online can help a lot with buying other beauty products, not just make-up.
Tip #4: DON'T BECOME A BEAUTY BLOGGER!
....but use them as a resource. People who blog, YouTube, review online, or generally provide details on good or bad products are great resources for you. I know that I find the world of beauty to be a really fun hobby. While others might allot resources else where this is one of the things I prioritize. Thus, we are both winners! I can help you focus your money where you want it though my trial and error. My product reviews are very helpful for that.
Tip #5: Embrace Your Natural Beauty-
While make-up can be a great confidence booster and a fun way to express yourself, I find that sometimes the best thing to wear is a smile. Some days I don't wear make-up or I just wear some eyeliner. Nobody acts differently towards me as long as I am projecting my usual demeanor. Just give it a try! For example, you are doing hot yoga. You could bust out the water proof mascara, or you could accept that everyone is concentrating on not passing out in the 105 degree heat. In full on boat pose, I know I'm not noticing if you have Kim Kardashian lashes right now. People will probably be more impressed with the fact you kick ass at tree pose.
Thanks for reading my tips for beauty on any budget! Also, did you notice that I got approved to have ads on my blog? No? Good. I find ads pretty annoying but hopefully these aren't too annoying. You might even have a hard time finding it. I did try and customize them so you might actually be interested in them though! If you feel like clicking on them so I might someday be able to buy a new lipstick with the money, I'd be down.
Shine & Sparkle!
* I am not paid or contacted by any of the companies mentioned in this post. These are my honest feelings and opinions.
Whether you are trying to stay on a budget, naturally frugal, or diving into your vault full of gold coins (I didn't know how Scrooge McDuck did it without cracking open his cartoon head, but we will pretend it is possible for the sake of my metaphor), everyone enjoys saving a bit of money. Maybe you are just jumping into the beauty world and are looking for a good place to start without investing too much money. In this post I give you some of my tips to get great deals on quality beauty products you can read from your 3rd mansion in Beverly Hills or your cardboard box camped outside of a Starbucks with free wi-fi (do Starbucks actually have free wi-fi anymore?)
![]() |
| As usual, like my last image, I'll gladly give someone credit for their image or take it down if whoever owns it throws a hissy fit. |
Tips #1: Shop The Cheapest Drug Store Brands for Make-Up-
While most people know that the drug store is cheaper than Sephora or department stores, there are brands that are even more affordable than those that are readily recognizable to the average shopper. My favorites of these very low priced brands include: Wet n' Wild*, E.L.F, and NYX. I find that more often than not, these brands have better than average products on the most frequent basis. That being said, each of these brands really shines in specific areas. I have provided a guide to help you save money by increasing your chances that you do not waste your money based on my experiences:
Where Discount Brands Excel:
Wet n' Wild: Eye Shadow, Mascara, Nail Polish
E.L.F: Eye liner, Primers, Face Products (powder, blush, bronzer, highlighter etc), and brushes.
NYX: Lip Products (Gloss, Lipstick, Lip liner)
Physician's Formula**: Foundation
**While Physician's Formula isn't a super discounted brand, I feel that it is worth it to spend a bit extra on the base products that are going to soak into your skin the most. I have also never gotten a good foundation from any of the very cheap brands. Physician's formula has great quality products to choose from and is mid-range drug store pricing.
People also may see Jordana and NYC as equivalent brands in price. However, I find them to be very hit or miss. I think if you stick to the discount brand guidelines above, you stand the best chance of actually loving what you get.
Also shop with coupons or online to see/get the best deals. There are many blogs about couponing or finding the best deals online, so I will let you look that up somewhere else.
Tips #2: Prioritize Make-Up Spending-
This is surprisingly hard for some people. Much like wardrobe shopping, when you have limited resources, you want to get the essentials and then pieces that can be combined and reworked in different ways to achieve many different looks. This way it appears to the world that you have way more than you do. So using the low priced brands above, I have created a list of essential products you need. I have also included mini-tips to created multiple looks with less products (seriously, they are very mini, get your reading glasses).
List of Essential Make-Up Products:
1. Face primer (1)
Mini-Tip: Use your face primer as an eye primer. It works.
2. Foundation/Tinted Moisturizer (1) and Matching Powder (1)
Mini-Tip: You can mix a bit of your powder into your foundation and use as concealer if you are really trying to scale back on makeup.
3. Blush (2) and Bronzer (1)
Mini-Tip: You want one light blush for day time, and one darker blush for night. I suggest one be shimmer and one be matte. Which is shimmer depends on your preference. I suggest that your bronzer be matte to fit any occasion. Also, skip the highlighter when you are on a budget. That peachy/pearly eyeshadow color? Same thing.
4. Eyeshadow Pallets (2-3).
Mini-Tip: You need a mix of neutral shades and bright shades. You should have some matte and some shimmer shades to play with. You can definitely meet these criteria with just two pallets, but you can splurge on a third (especially if you are using a light color as a highlight!) Different eyeshadow looks is the easiest way to make you look dramatically different while your base products stay the same.
5. Eyeliner (1) and Lip Liner (1)
Mini-Tip: If you stick with a soft black eyeliner and a lipliner similar to your lip color, you will be set no matter what. You can just put some dark black eyeshadow over the liner to make it more bold and the softness will make it ok for day time. The lipliner will serve it's purpose as a base without changing the color of your lip products.
6. Mascara (2)
Mini-Tip: One water-proof, one not water proof. I would also suggest the water proof one to be more day time level of lash intensity (for being active during the day) and have the non-water proof one be more dramatic since it is unlikely you are going to need to be protected from water at night (unless you are more of an active person at night or cry a lot at night because you are a drama queen heehee).
7. Lipsticks (3) and Glosses (3)
Mini-Tip: You should aim for one nude, one "my lip color but better" (usually berry or pink), and one red of each. By mixing and matching these lipsticks and glosses, your possibilities are endless. You can wear the lipsticks and glosses in combination together, or each by themselves.
Tip #3: Shop Generic Beauty-
Shop generic for your moistuizers, cleaners, shampoos and conditioners. Sally's Beauty Supply has generics of even high end beauty products! How cool is that! Again, coupons, bargain/sales shelves, and buying online can help a lot with buying other beauty products, not just make-up.
Tip #4: DON'T BECOME A BEAUTY BLOGGER!
....but use them as a resource. People who blog, YouTube, review online, or generally provide details on good or bad products are great resources for you. I know that I find the world of beauty to be a really fun hobby. While others might allot resources else where this is one of the things I prioritize. Thus, we are both winners! I can help you focus your money where you want it though my trial and error. My product reviews are very helpful for that.
Tip #5: Embrace Your Natural Beauty-
While make-up can be a great confidence booster and a fun way to express yourself, I find that sometimes the best thing to wear is a smile. Some days I don't wear make-up or I just wear some eyeliner. Nobody acts differently towards me as long as I am projecting my usual demeanor. Just give it a try! For example, you are doing hot yoga. You could bust out the water proof mascara, or you could accept that everyone is concentrating on not passing out in the 105 degree heat. In full on boat pose, I know I'm not noticing if you have Kim Kardashian lashes right now. People will probably be more impressed with the fact you kick ass at tree pose.
Thanks for reading my tips for beauty on any budget! Also, did you notice that I got approved to have ads on my blog? No? Good. I find ads pretty annoying but hopefully these aren't too annoying. You might even have a hard time finding it. I did try and customize them so you might actually be interested in them though! If you feel like clicking on them so I might someday be able to buy a new lipstick with the money, I'd be down.
Shine & Sparkle!
* I am not paid or contacted by any of the companies mentioned in this post. These are my honest feelings and opinions.
Friday, February 22, 2013
Creative Beauty Solutions Quick Tip
Hi S+SR Readers!
Here in February, I think people have posted a lot of Spring/Valentines Day related things. We instead of buying into a consumer culture created holiday, I want to start a whole new S+SR category: "S+SR Tips!" Today I'm going to be talking about some creative beauty solutions that would even impress Macgyver (linked for anyone who needs a reference point). So rather than a lengthy chit chat, lets get straight into the tips!
1) Printer Paper as Blotting Paper:
Blotting paper is sometimes really expensive (not if you use the E.L.F one from this post!) And let us all admit, we sometimes leave your blotting paper in another purse, or have run out, or it fell down the rabbit hole to who-knows-where. So you are icky and shiny (not in a Sparkle and Shine way, but a greasy way). I suggest grabbing any while printer paper (scrap paper, post-it, junk mail, does not really matter) and tearing off a blotting paper sized piece. Gently press (dont rub or it will take off your make up) on your face (be sure to not get a paper cut or poke yourself in the eye!) and you will see the paper absorb the oil off your face. I have found this works great in a pinch. Macgyver better watch out, Ms. Sparkles is in the building!
2) Lipstick/Tinted Lip Products as Blush:
This is a tip you might have gotten from your grandmother, but it is much better than the one about straightening your hair with a clothes iron. Simply said, draw a line of your lipstick, in a color a bit darker than you want on your cheeks, along your cheek bone. Then blend it out with your fingers. Way to make your products do double duty!
3) Cream Eye Shadow/Eyeliner as Eyeshadow Primer:
Using Cream Eye shadows or Eyeliner as a primer is a pretty common occurrence in YouTube tutorials, but I thought I would reiterate it here. Take whatever color cream eyeshadow or eyeliner you want as a base and build your powder shadow over it. The stickier textured base will help your eyeshadow look last all day. I find this works just as well as an eyeshadow primer, though it tends to be a little heavier feeling on the eyes. Note that a white base will make your powder shadows look the truest to how it looks in the package. All other colored bases (even your normal skin tone will affect the way the shadow looks on your eyes. Mini Tip: Many eye creams have a similar texture and feel to eyeshadow primer. If you use an eye cream, try using this as your primer instead. I find my Burt's Bees Radiance Eye Cream with Royal Jelly works great as a primer too!
4) Hair Conditioner as Shaving Cream:
I am in progress of becoming a certified product junkie. In this venture I have tried quite a few more products than the average person. Some work, and some do not. While it is possible to return some products if you do not like them, it takes a good amount of product to fully test shampoos and conditioners. I don't think you can return a conditioner if you used 1/3 of it. So what do I do with conditioners I have decided don't work for my hair? I use them as shaving cream. It works really well and leaves my legs very soft. I'm not particularly prone to razor burns, but I actually find that my skin is much happier using conditioner over shaving cream. I still like to use my target brand soy shaving creme (which is supposed to slow the regrowth of the hairs) but using up my conditioner this way puts the product to good use. (Yey not being wasteful!)
5) Shampoo as Make-Up Brush Cleaner:
In the same way I don't like to waste my conditioner duds, I also don't like to waste my shampoo duds. Can the shampoo clean my make up brushes and body? Yep. Can about 1/3 a cup in the bath or 1/4 a cup in a foot soak leave you feeling soft and clean? Yep. The best use depends on how sudsy and moisturizing the shampoo is.
6) Hair Conditioners + Water as a De-tangler:
For my last tip, You can take your favorite conditioner or leave-in cream conditioner. Use about 1 tbs in a spray bottle with 1.5 cups of water and use as a detangler or light weight spray leave in conditioner. If you find it weighing your hair down, add more water or less conditioner =)
Do you feel sufficiently creative? You should!.
Shine & Sparkle!
Here in February, I think people have posted a lot of Spring/Valentines Day related things. We instead of buying into a consumer culture created holiday, I want to start a whole new S+SR category: "S+SR Tips!" Today I'm going to be talking about some creative beauty solutions that would even impress Macgyver (linked for anyone who needs a reference point). So rather than a lengthy chit chat, lets get straight into the tips!
![]() |
| Squiggles the Guinea Pig is quickly becoming a mascot of the S&SR Report! |
1) Printer Paper as Blotting Paper:
Blotting paper is sometimes really expensive (not if you use the E.L.F one from this post!) And let us all admit, we sometimes leave your blotting paper in another purse, or have run out, or it fell down the rabbit hole to who-knows-where. So you are icky and shiny (not in a Sparkle and Shine way, but a greasy way). I suggest grabbing any while printer paper (scrap paper, post-it, junk mail, does not really matter) and tearing off a blotting paper sized piece. Gently press (dont rub or it will take off your make up) on your face (be sure to not get a paper cut or poke yourself in the eye!) and you will see the paper absorb the oil off your face. I have found this works great in a pinch. Macgyver better watch out, Ms. Sparkles is in the building!
2) Lipstick/Tinted Lip Products as Blush:
This is a tip you might have gotten from your grandmother, but it is much better than the one about straightening your hair with a clothes iron. Simply said, draw a line of your lipstick, in a color a bit darker than you want on your cheeks, along your cheek bone. Then blend it out with your fingers. Way to make your products do double duty!
3) Cream Eye Shadow/Eyeliner as Eyeshadow Primer:
Using Cream Eye shadows or Eyeliner as a primer is a pretty common occurrence in YouTube tutorials, but I thought I would reiterate it here. Take whatever color cream eyeshadow or eyeliner you want as a base and build your powder shadow over it. The stickier textured base will help your eyeshadow look last all day. I find this works just as well as an eyeshadow primer, though it tends to be a little heavier feeling on the eyes. Note that a white base will make your powder shadows look the truest to how it looks in the package. All other colored bases (even your normal skin tone will affect the way the shadow looks on your eyes. Mini Tip: Many eye creams have a similar texture and feel to eyeshadow primer. If you use an eye cream, try using this as your primer instead. I find my Burt's Bees Radiance Eye Cream with Royal Jelly works great as a primer too!
4) Hair Conditioner as Shaving Cream:
I am in progress of becoming a certified product junkie. In this venture I have tried quite a few more products than the average person. Some work, and some do not. While it is possible to return some products if you do not like them, it takes a good amount of product to fully test shampoos and conditioners. I don't think you can return a conditioner if you used 1/3 of it. So what do I do with conditioners I have decided don't work for my hair? I use them as shaving cream. It works really well and leaves my legs very soft. I'm not particularly prone to razor burns, but I actually find that my skin is much happier using conditioner over shaving cream. I still like to use my target brand soy shaving creme (which is supposed to slow the regrowth of the hairs) but using up my conditioner this way puts the product to good use. (Yey not being wasteful!)
5) Shampoo as Make-Up Brush Cleaner:
In the same way I don't like to waste my conditioner duds, I also don't like to waste my shampoo duds. Can the shampoo clean my make up brushes and body? Yep. Can about 1/3 a cup in the bath or 1/4 a cup in a foot soak leave you feeling soft and clean? Yep. The best use depends on how sudsy and moisturizing the shampoo is.
6) Hair Conditioners + Water as a De-tangler:
For my last tip, You can take your favorite conditioner or leave-in cream conditioner. Use about 1 tbs in a spray bottle with 1.5 cups of water and use as a detangler or light weight spray leave in conditioner. If you find it weighing your hair down, add more water or less conditioner =)
Do you feel sufficiently creative? You should!.
Shine & Sparkle!
Subscribe to:
Posts (Atom)